
Below is a concise, step-by-step guide to navigating and updating Settings → General.
Access
1) Go to the left sidebar, click Settings (gear icon).
2) Under Settings, choose General.

How the page works
- Most fields are inline-editable (underlined). Click the underlined value to edit.
- For text/number fields: after editing, click the green check to save or red X to cancel.
- For dropdowns: select a value, then confirm with the green check.
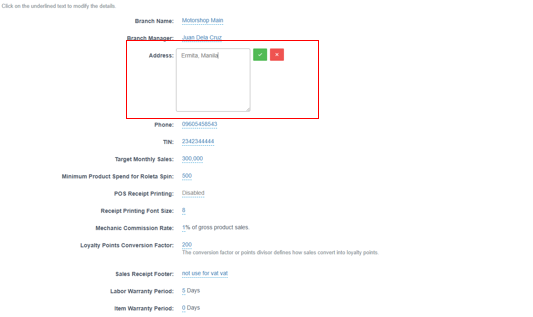
- For text areas (multi-line): edit text, then confirm/cancel.
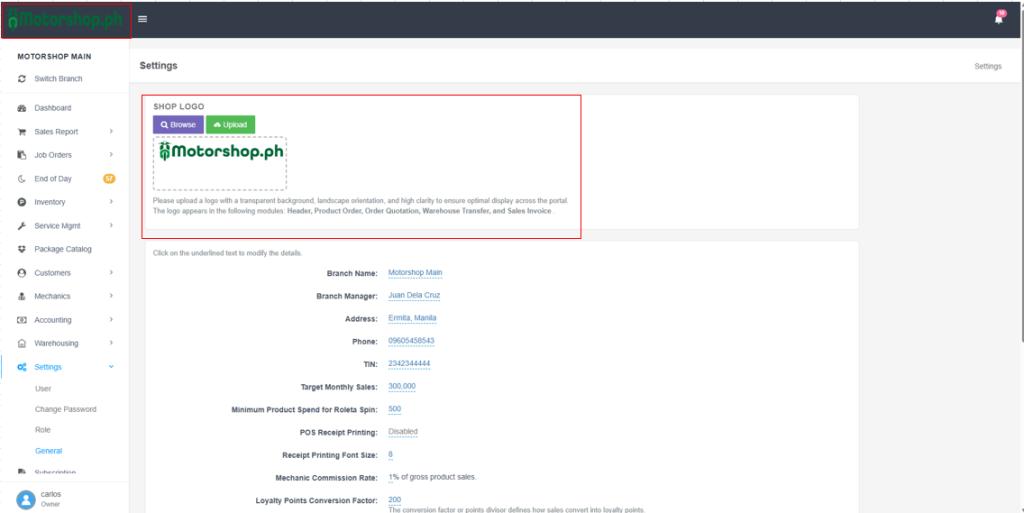
Sections & Fields (what they mean)
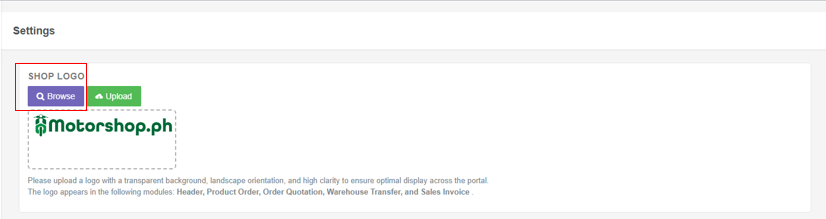
Shop Logo: Browse/Upload a transparent, landscape logo; appears on Header, Product Order, Order Quotation, Warehouse Transfer, Sales Invoice.
Edit/Change your logo
Click “Browse“
Browse your logo

then click upload to set the logo
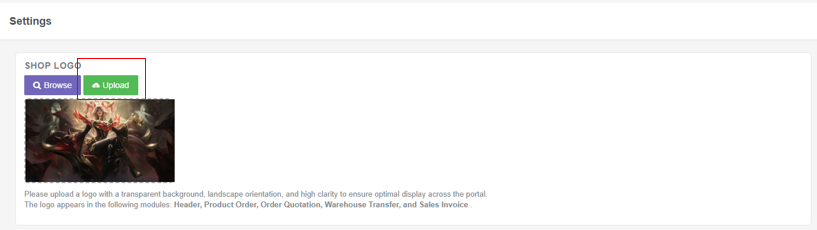
After uploading, the logo will be applied automatically.
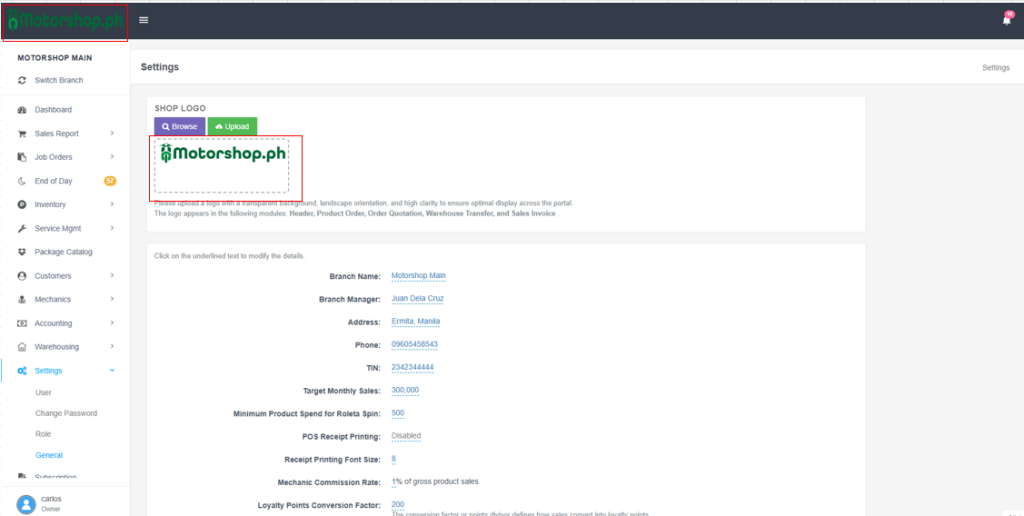
Branch Name: Store/branch display name.
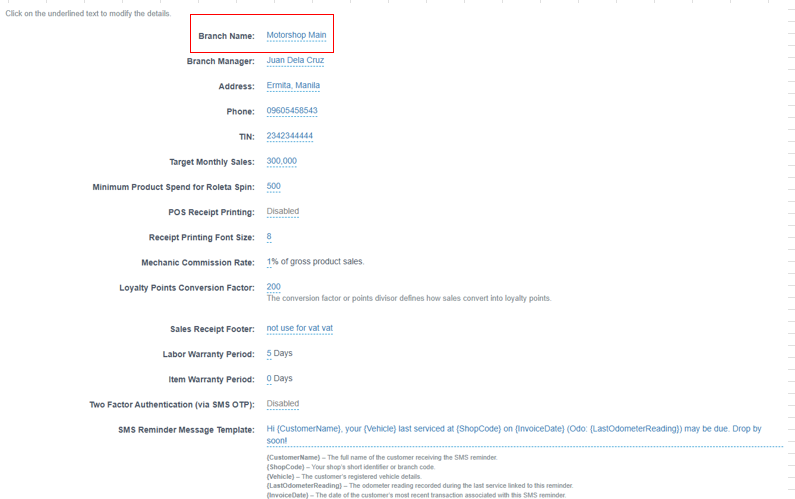
Clicked the Underlined name to edit, click “check “button to save and “X” button to cancel

Branch Manager: Name of the manager.
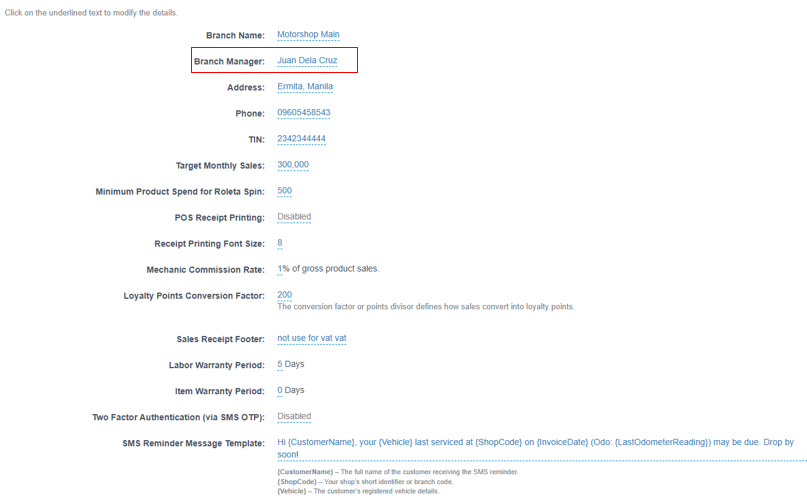
Clicked the Underlined name to edit, click “check “button to save and “X” button to cancel

Address: Branch address.
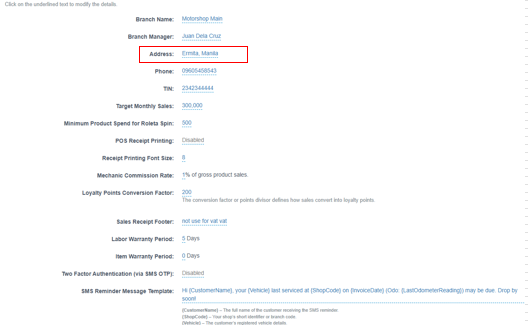
Clicked the Underlined address name to edit, click “check “button to save and “X” button to cancel
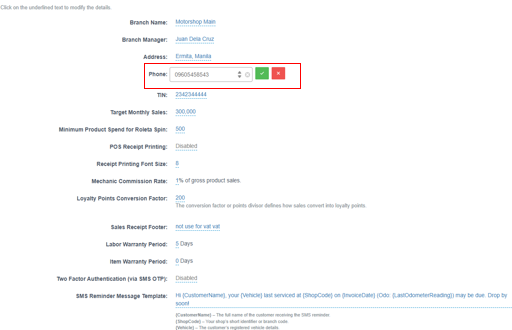
Phone: Contact number.
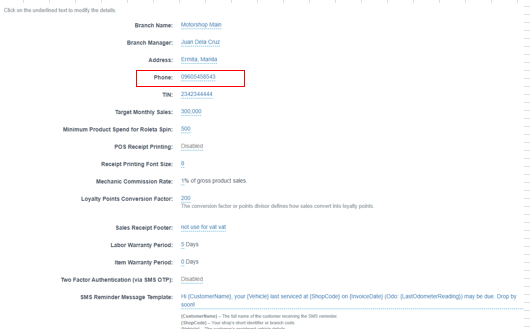
Clicked the Underlined Number to edit, click “check “button to save and “X” button to cancel
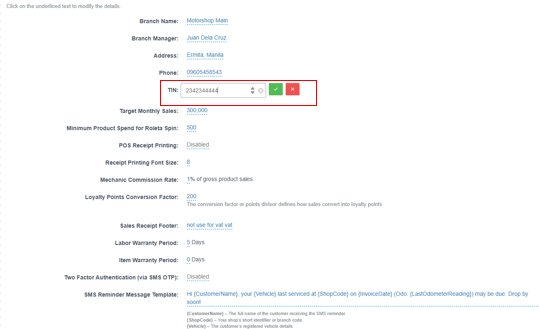
TIN: Tax Identification Number.
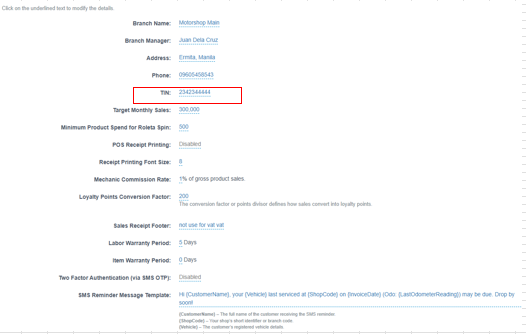
Clicked the Underlined Number to edit, click “check “button to save and “X” button to cancel
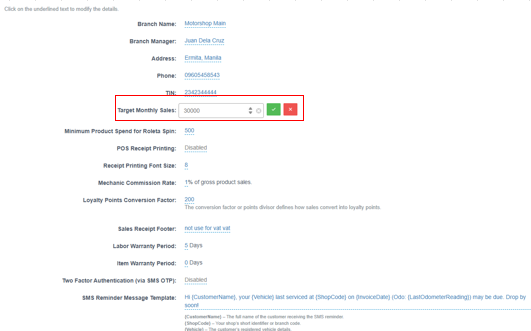
Target Monthly Sales: Monthly revenue target (used for performance tracking).
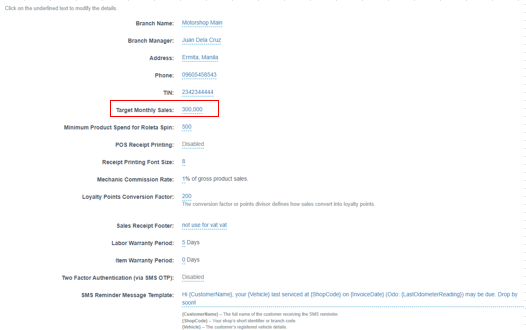
Clicked the Underlined Number to edit, click arrow up and arrow down to increase and decrease amount, click “check “button to save and “X” button to cancel
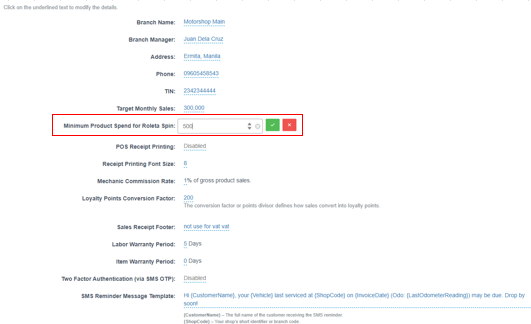
Minimum Product Spend for Roleta Spin: Minimum purchase to qualify for Roleta Spin.
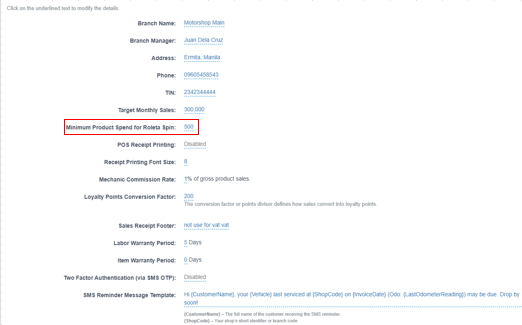
Clicked the Underlined Number to edit, click arrow up and arrow down to increase and decrease amount, click “check “button to save and “X” button to cancel
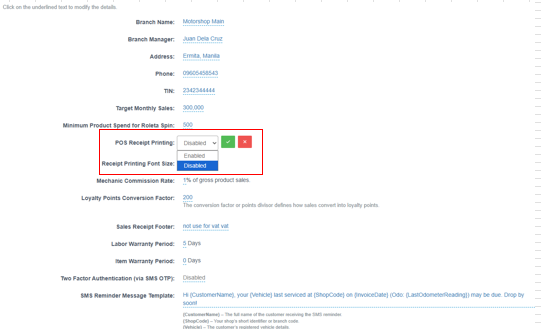
POS Receipt Printing: Enabled/Disabled receipt printing.
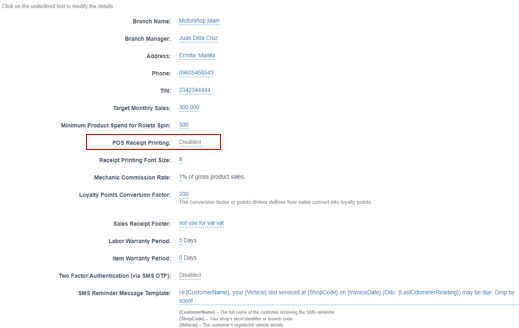
Click and choose Enable and Disable options for receipt Printing
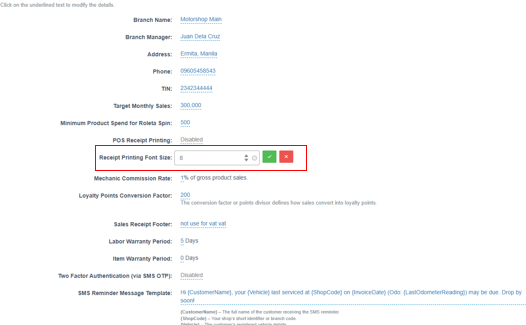
Receipt Printing Font Size: Font size for POS receipts.
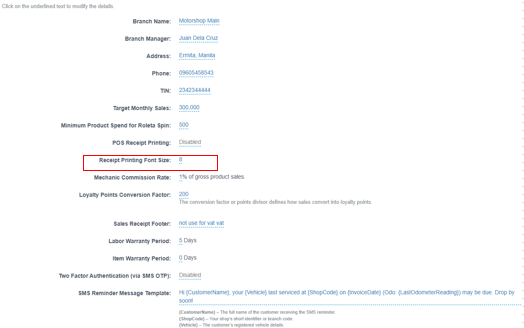
Clicked the Underlined Number to edit, click arrow up and arrow down to increase and decrease size, click “check “button to save and “X” button to cancel
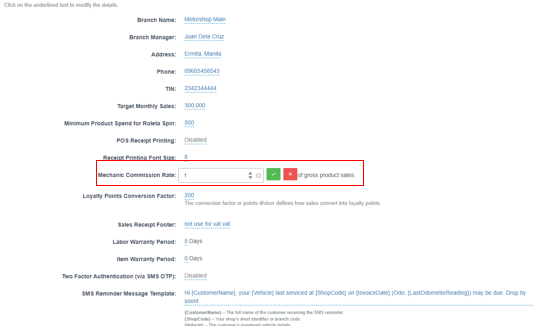
Mechanic Commission Rate: % of gross product sales for mechanic commission.

Clicked the Underlined Number to edit, click arrow up and arrow down to increase and decrease commission rate, click “check “button to save and “X” button to cancel
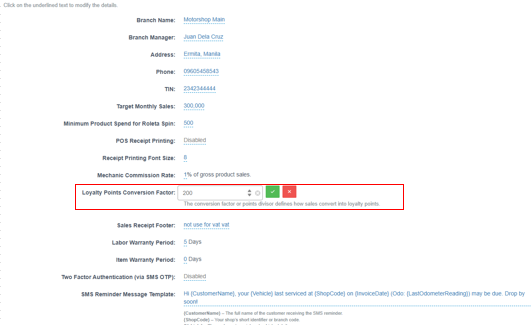
Loyalty Points Conversion Factor: Points divisor/factor for converting sales to loyalty points.
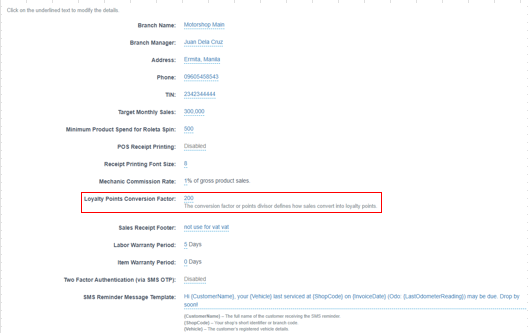
Clicked the Underlined Number to edit, click arrow up and arrow down to increase and decrease Points Conversion Factor or Type, click “check “button to save and “X” button to cancel
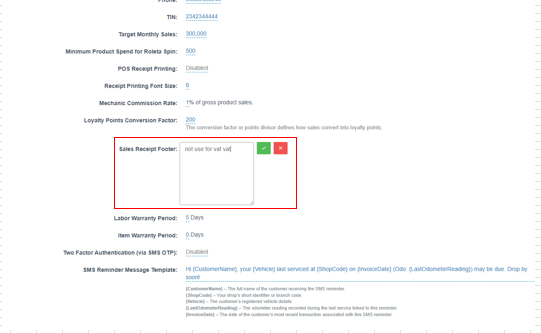
Sales Receipt Footer: Custom footer text printed on sales receipts.
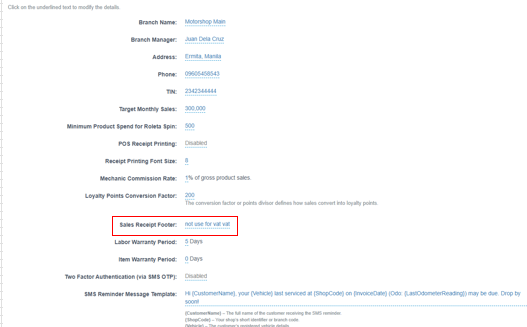
Clicked the Underlined name to edit, click “check “button to save and “X” button to cancel
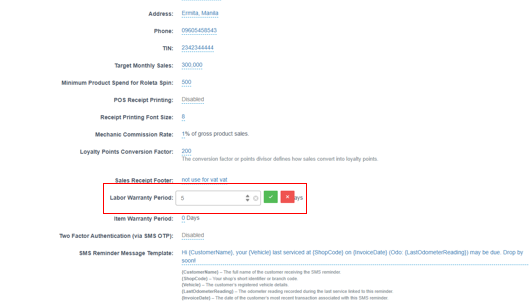
Labor Warranty Period: Warranty duration (days) for labor.
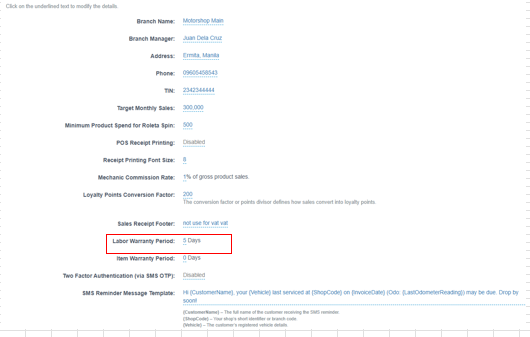
Clicked the Underlined Number to edit, click arrow up and arrow down to increase and decrease Labor Warranty Duration Factor or Type, click “check “button to save and “X” button to cancel
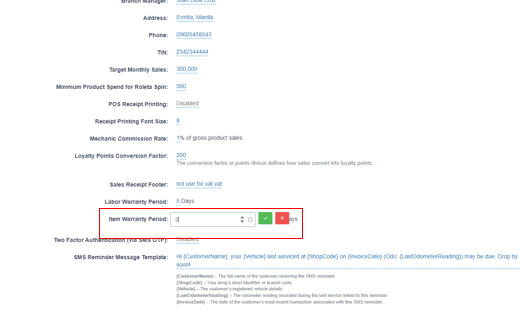
Item Warranty Period: Warranty duration (days) for items.
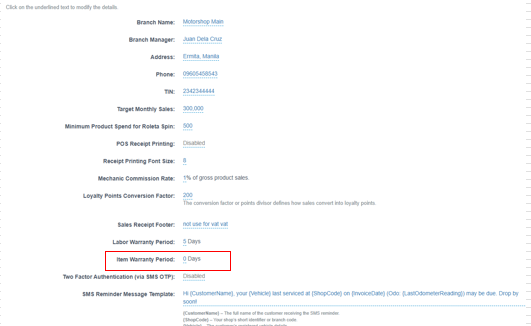
Clicked the Underlined Number to edit, click arrow up and arrow down to increase and decrease Item Warranty Period or Type, click “check “button to save and “X” button to cancel
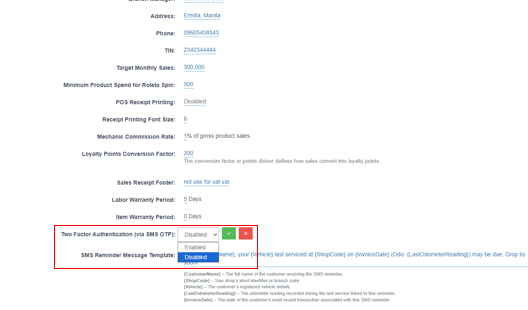
Two Factor Authentication (via SMS OTP): Enable/disable SMS OTP.
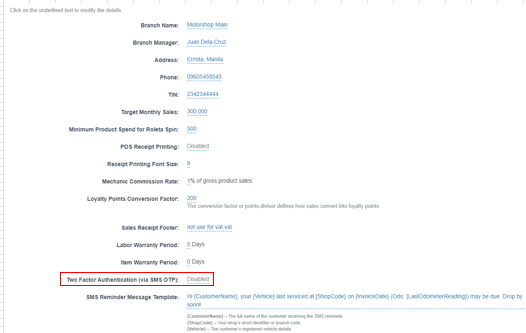
Click and choose Enable and Disable options for Text Factor Authentication via SMS OTP
SMS Reminder Message Template: Template used for service reminders. Tokens you can use:
- {CustomerName}, {ShopCode}, {Vehicle}, {LastOdometerReading}, {InvoiceDate}
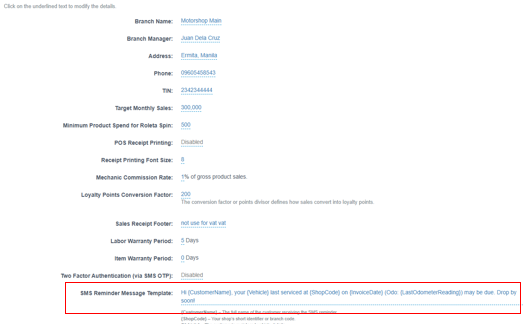
Click and customize your text message to your customer
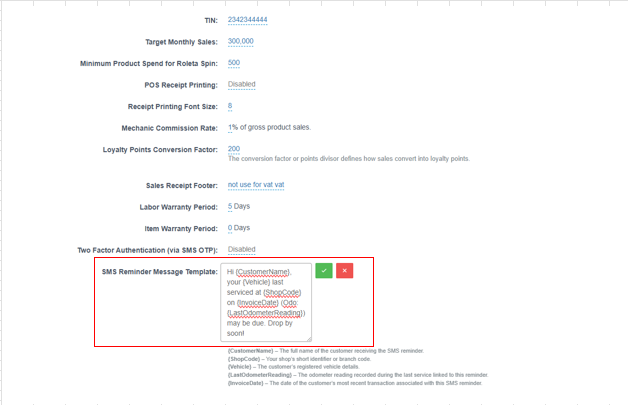
Quick reference to key tokens (SMS)
- {CustomerName} – customer full name
- {ShopCode} – branch code/short identifier
- {Vehicle} – registered vehicle details
- {LastOdometerReading} – last recorded odometer
- {InvoiceDate} – date of the last linked transaction
Common edits (step-by-step)
- Edit a text/number field: Click the underlined value → type the new value → click ✅.
- Change a dropdown (e.g., POS Receipt Printing): Click value → choose Enabled/Disabled → ✅.
- Update SMS template: Click the template text → edit message with tokens → ✅.
Helpful tips
- Save after each field change (use ✅); if you made a mistake, use the red X.
- Keep a transparent, landscape logo for best print/display results.
- Use tokens in the SMS template to personalize reminders and keep them concise.
- Set realistic targets and warranty periods that match your shop policy.
- If receipts look too small/large, adjust Receipt Printing Font Size and test print.