
- Go to https://portal.motodisk.com and log in.
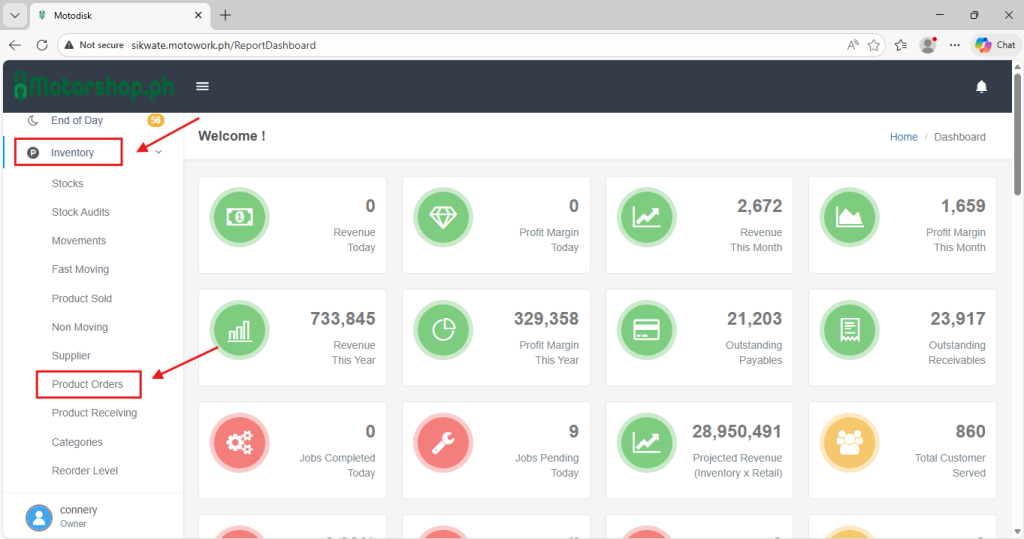
- In the side bar, select Inventory> Product Orders
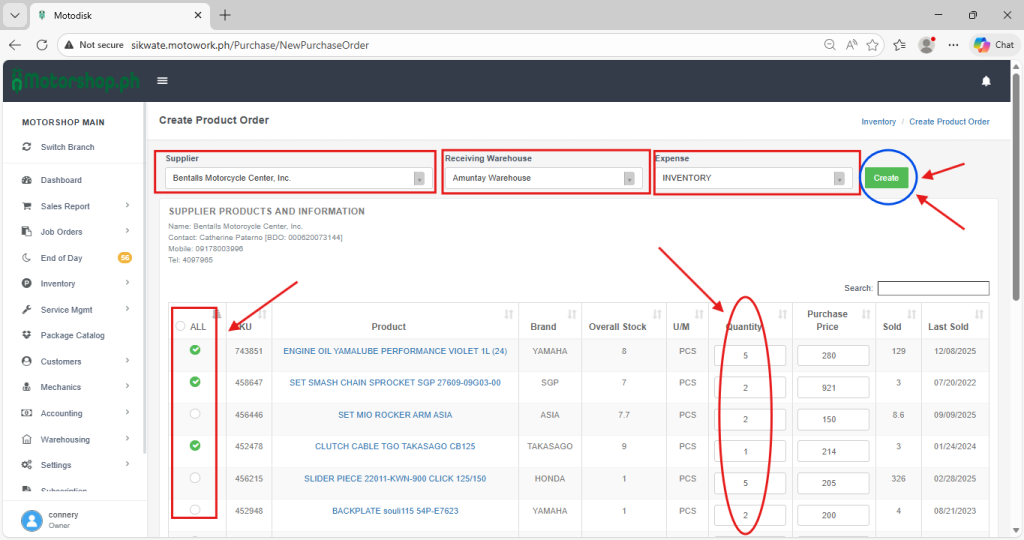
3. Click Create New Product Orders

4. Select a Supplier, Receiving Warehouse, and Expense, then choose the product you want to purchase by ticking it and entering the quantity you need. After that, click Create to generate a new product order.
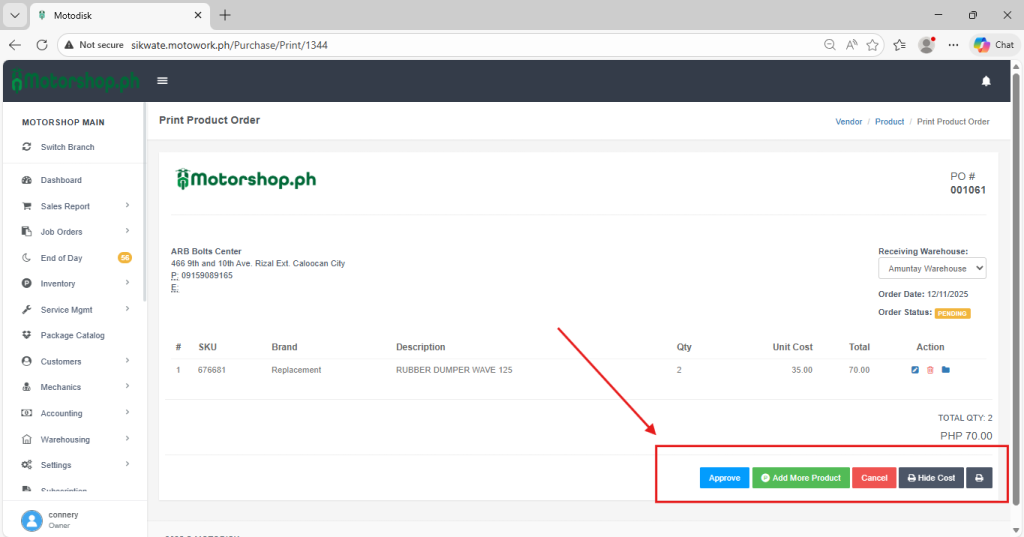
5. After clicking the Create button, you will be redirected to the Print Product Order page. At the bottom-right corner, you can select the following:
(i)Approve – to approve Creating New Product Orders.
(ii)Add more Product – to add more product.
(iii) Cancel – to cancel Creating New Product Orders.
(iv)Hide Cost – Print then hide the cost.
(v)Print icon – to print Product order.
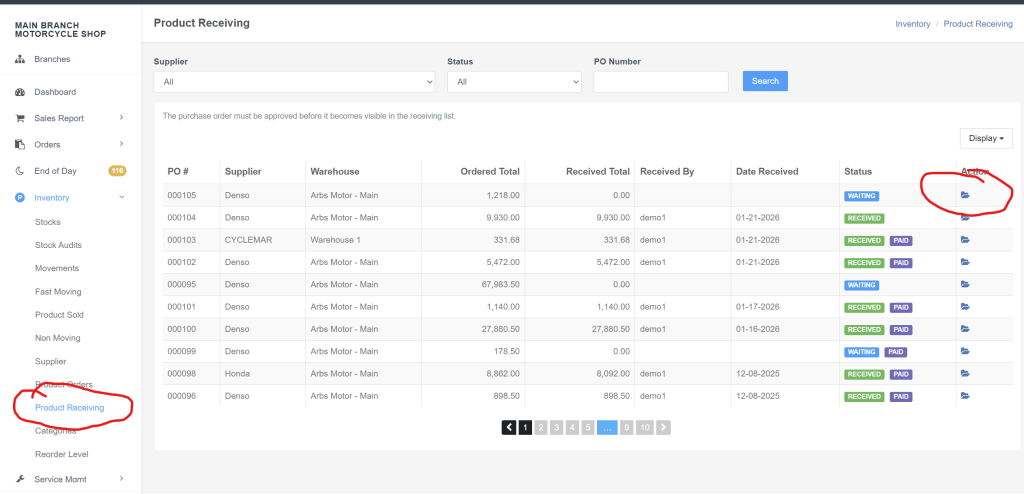
6. Receive the Product Orders to add to inventory
Once the Product Order is finalized, click the Approve button to prepare for receiving the product orders. go to Inventory -> Product Receiving and click the open folder
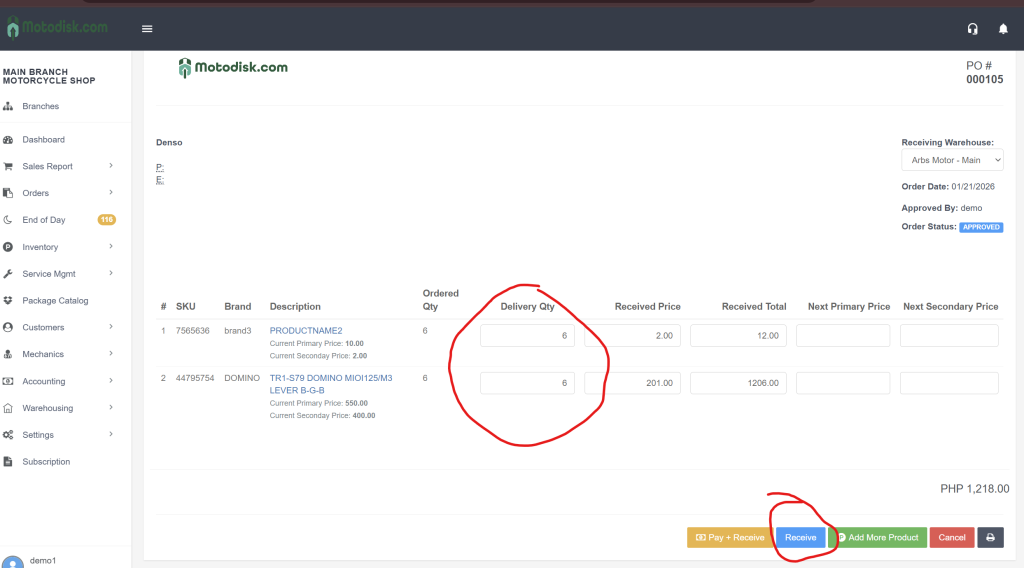
7. Review the Delivery Quantity and adjust if needed, then click the Receive button to confirm the product orders.
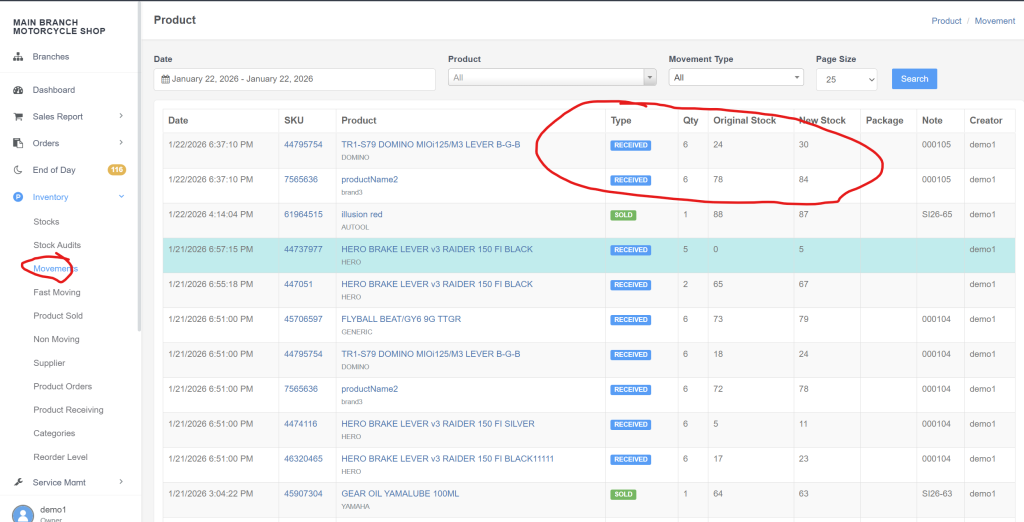
8. Once the product order is received, the delivery quantity will be added to the inventory. You can verify this under Inventory → Movements.
Video Guide