
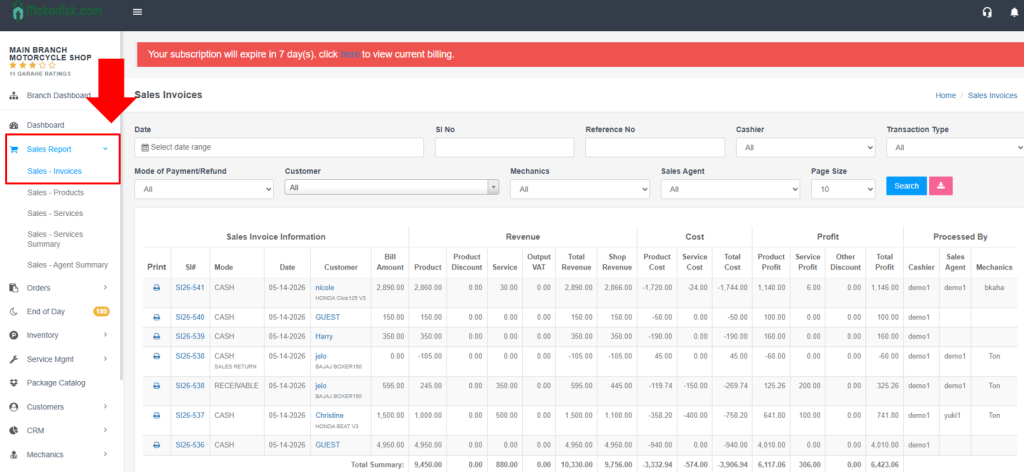
Access the Sales Invoice page from the left sidebar: click “Sales Report” (shopping cart icon), then select “Sales – Invoices” from the submenu.
- Go to https://portal.motodisk.com and log in
- In the left sidebar, find “MOTORSHOP MAIN”.
- Click “Sales Report” (shopping cart icon) to expand the menu.
- Click “Sales – Products” (highlighted in blue when active).
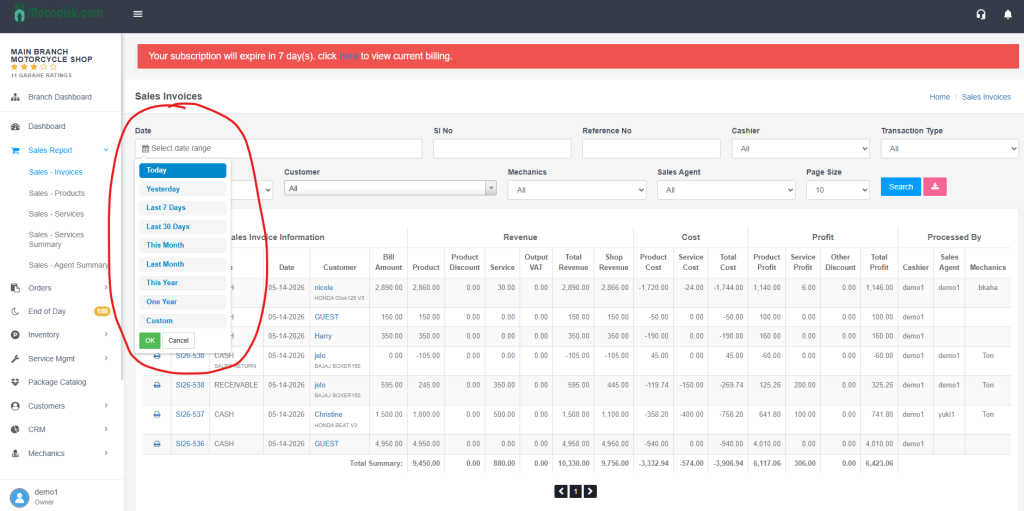
3. Using the Filter Section
- Use the filters at the top to narrow results:
- Date: Click the calendar icon to open the date picker.
- Quick options: Today, Yesterday, Last 7 Days, Last 30 Days, This Month, Last Month, One Year
- Or select “Custom” for a specific range
- Click “OK” to apply
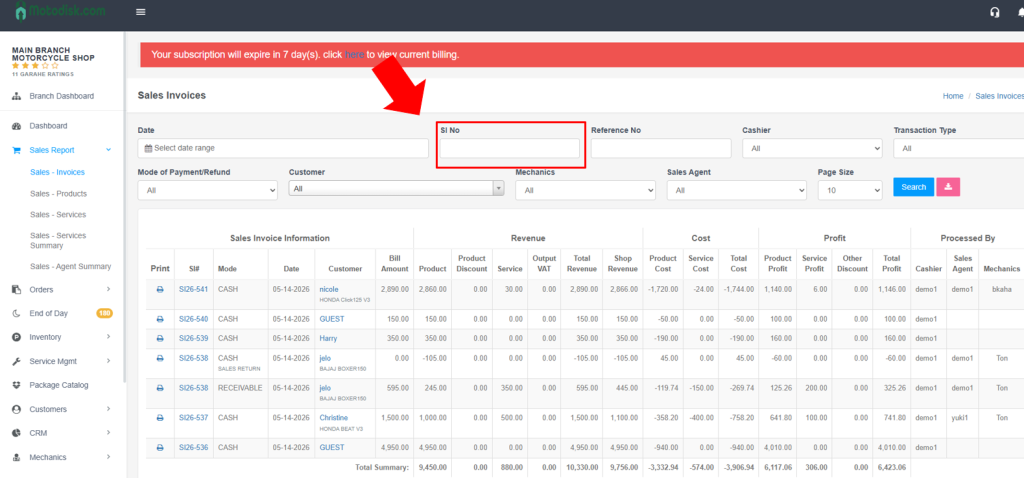
Receipt No: Enter a specific receipt number. (Sales Invoice number)
Cashier: Select a cashier from the dropdown options(e.g), or leave as “All”.
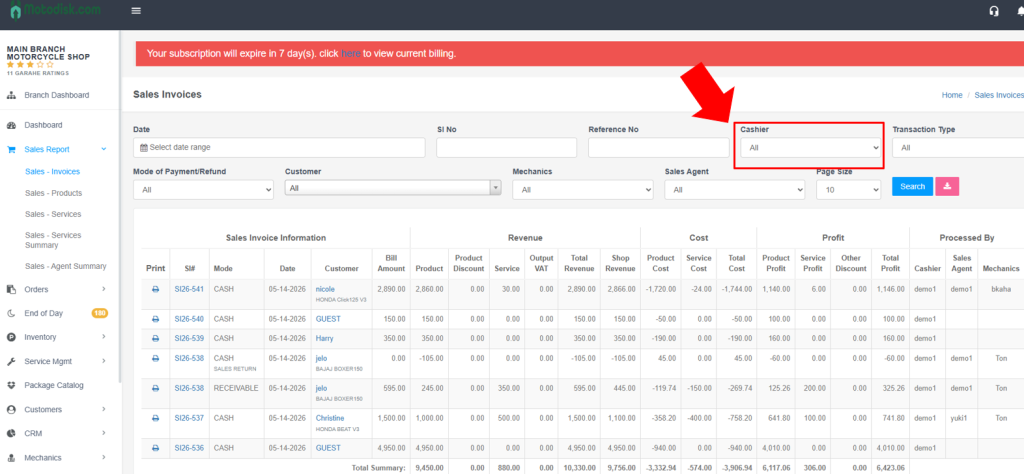
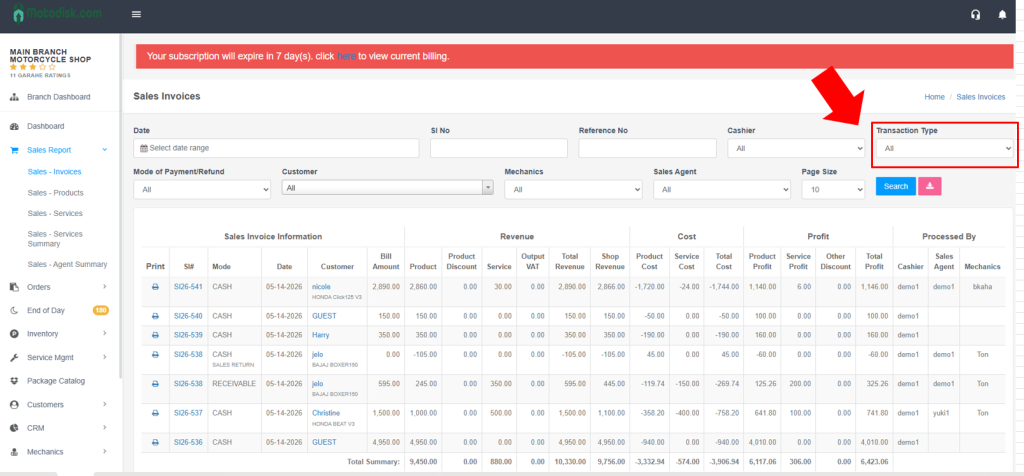
Transaction Type:
Choose: All, Sales Return, Reverse Service
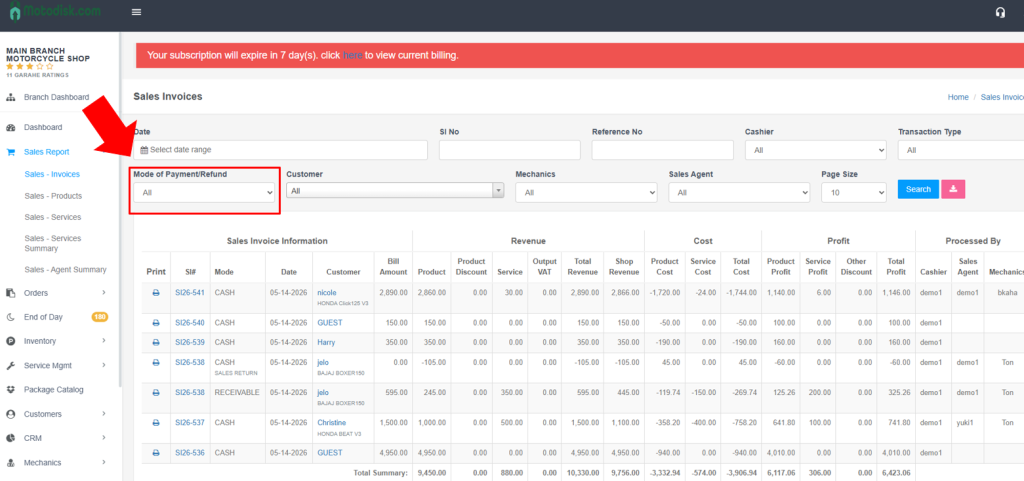
Mode of Payment/Refund: Select a payment method, or leave as “All”.
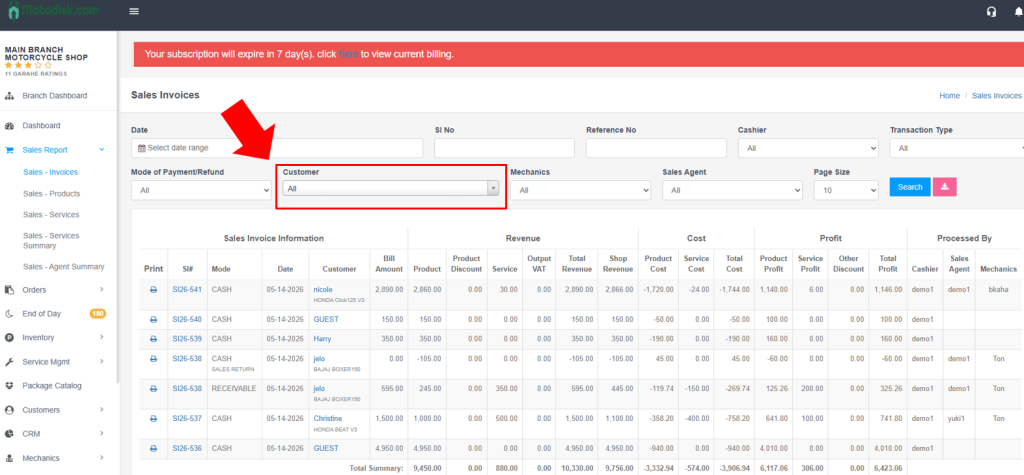
Customer: Enter a customer name, or leave empty to show all.(e.g)
Click the blue “Search” button to apply filters.
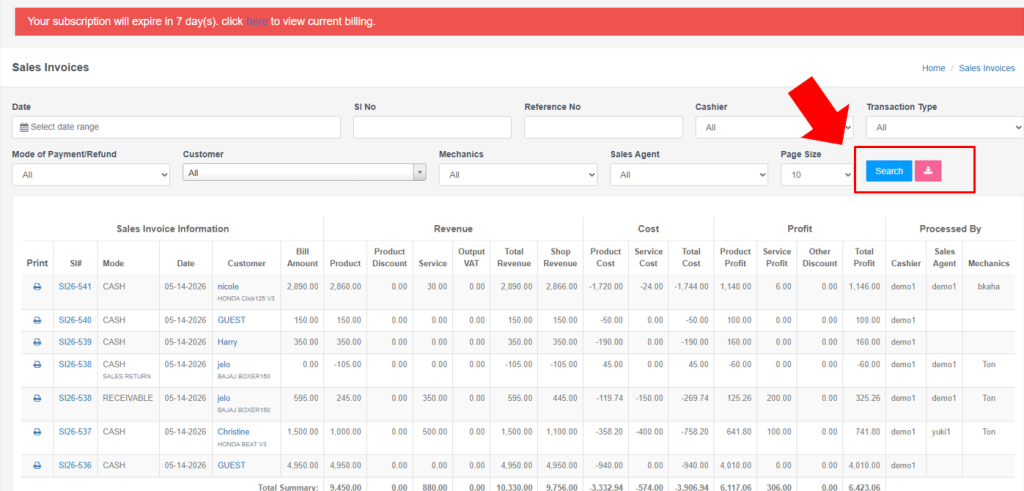
4. Understanding the Sales Invoice Table (all data are example given)
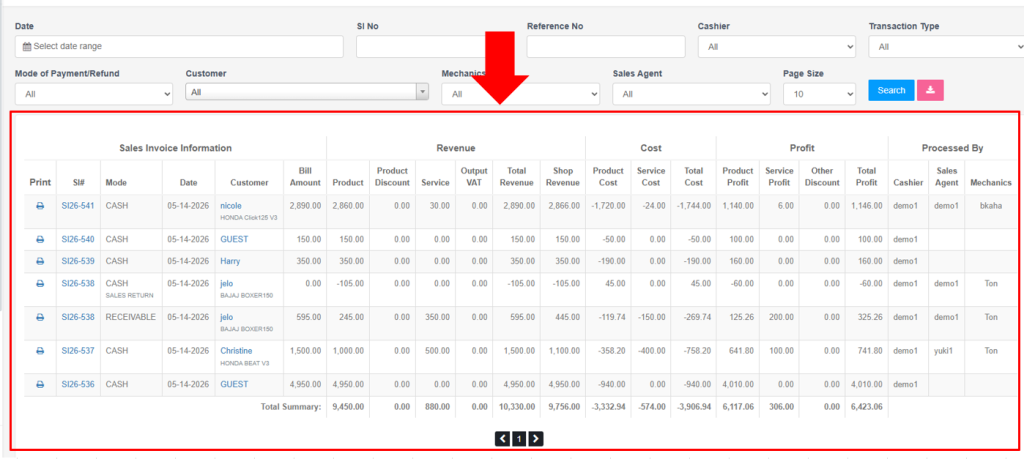
The table shows:
Sales Invoice Information(e.g)

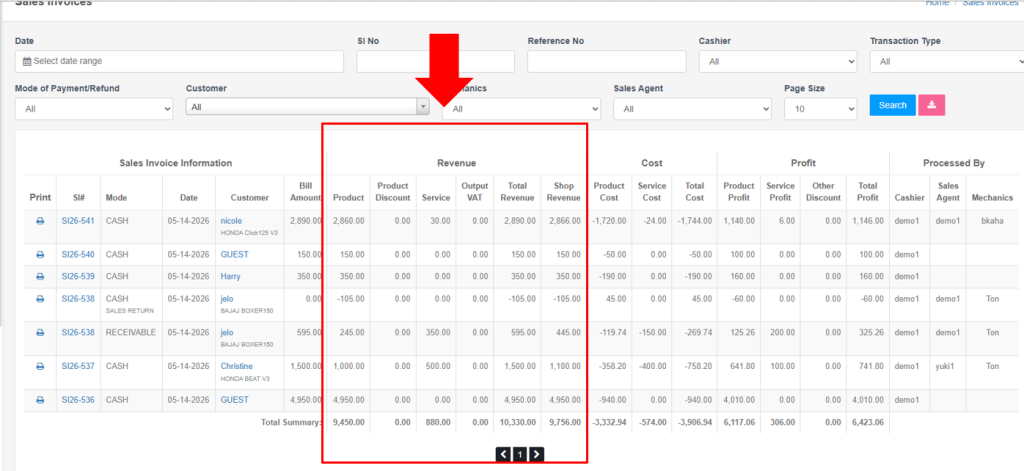
Revenue Section(e.g)
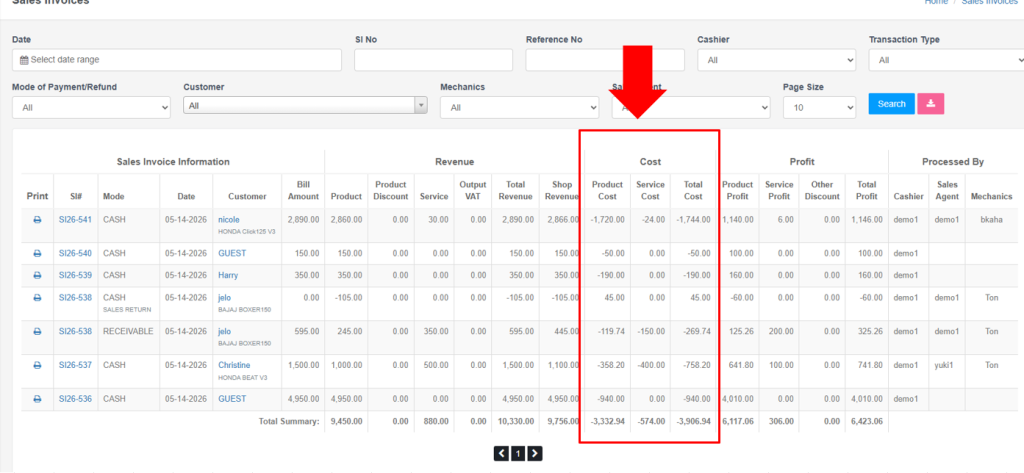
Cost Section(e.g)
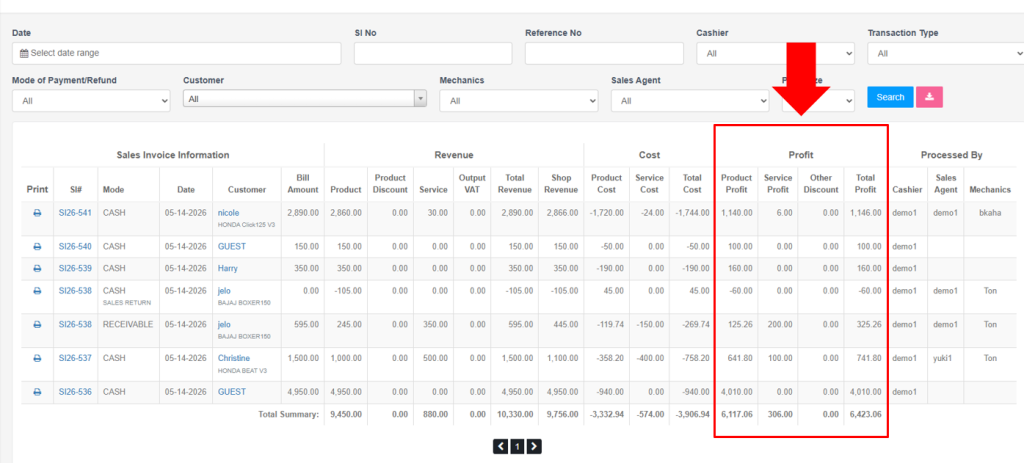
Profit Section (e.g)

5. Viewing Summary Information
A “Total Summary” row appears at the bottom with aggregated totals for all displayed invoices.

6. Additional Actions
View Invoice Details: Click the SI# (Sales Invoice number) link.
Print Invoice: Click the printer icon in the Print column.
View Customer Details: Click the Customer name link.

VIDEO TUTORIAL
Tip: Use multiple filters together for precise results. For example, filter by date range and cashier to see a specific cashier’s transactions for a period.