- Go to https://portal.motodisk.com and log in
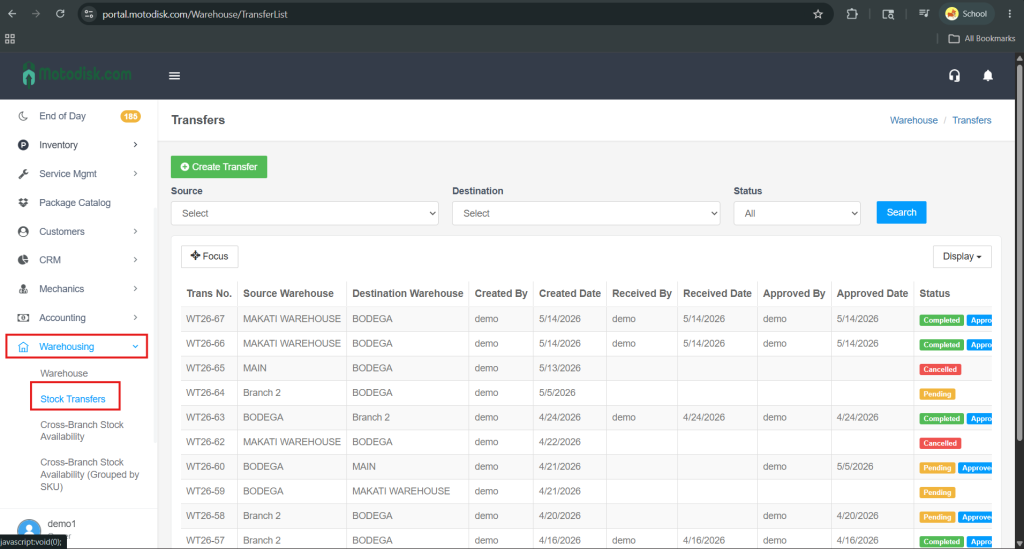
- In the side bar, select Warehousing > Stock Transfer
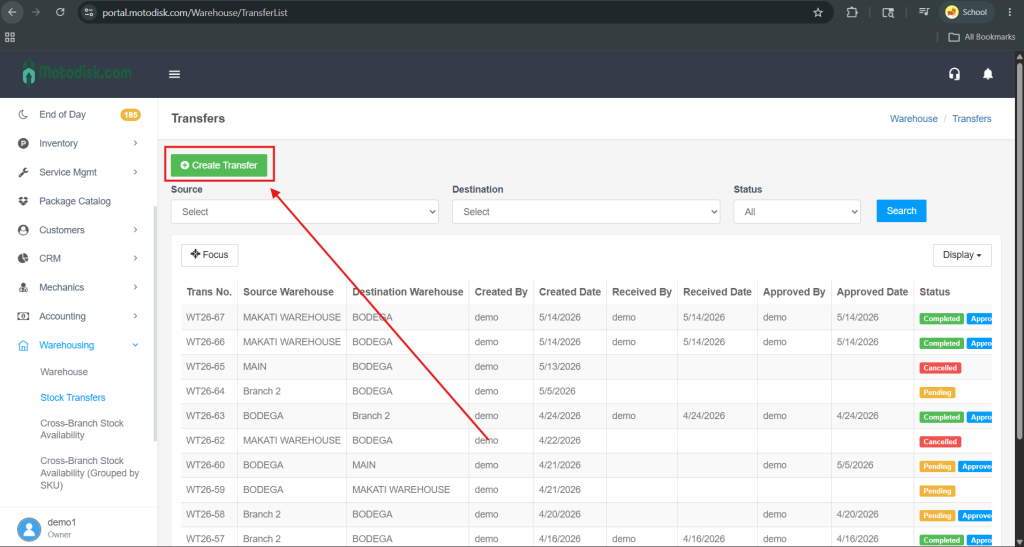
3. Click the Create Transfer button at the top of the page.
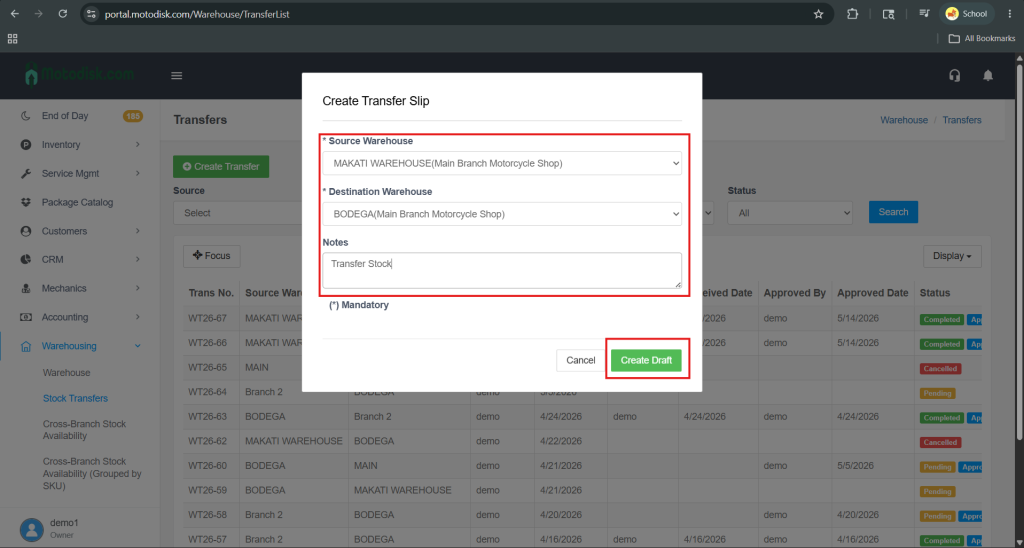
4. After clicking Create Transfer, select the source warehouse and destination warehouse, then enter the purpose of the stock transfer in the Notes field. Once completed, click Create Draft.
5. Click the Add Product to Transfer button to select a product for the stock transfer.
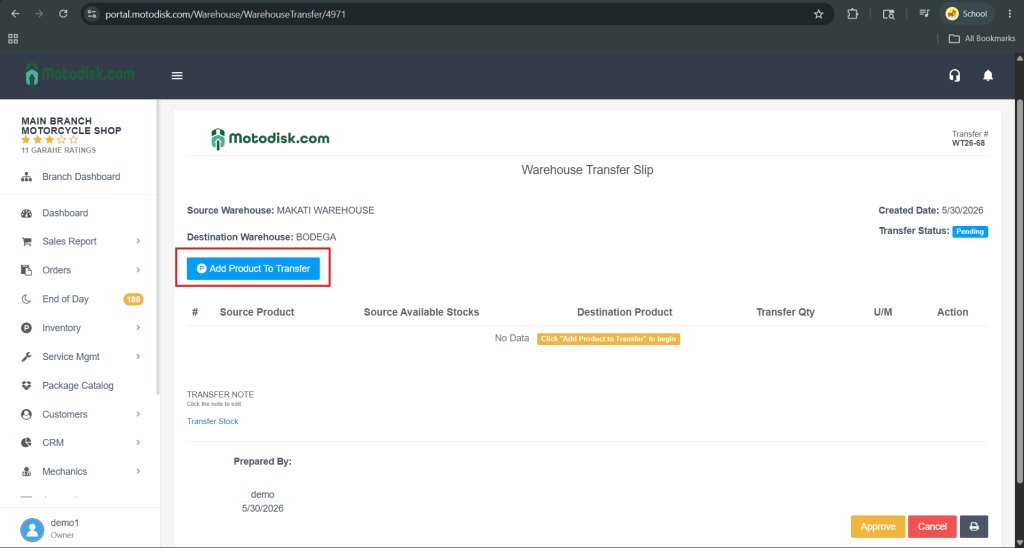
6. Search for the product you want to transfer, then enter the desired quantity and click the Add button.
Note: Ensure that the transfer quantity does not exceed the available stock quantity of the selected product.

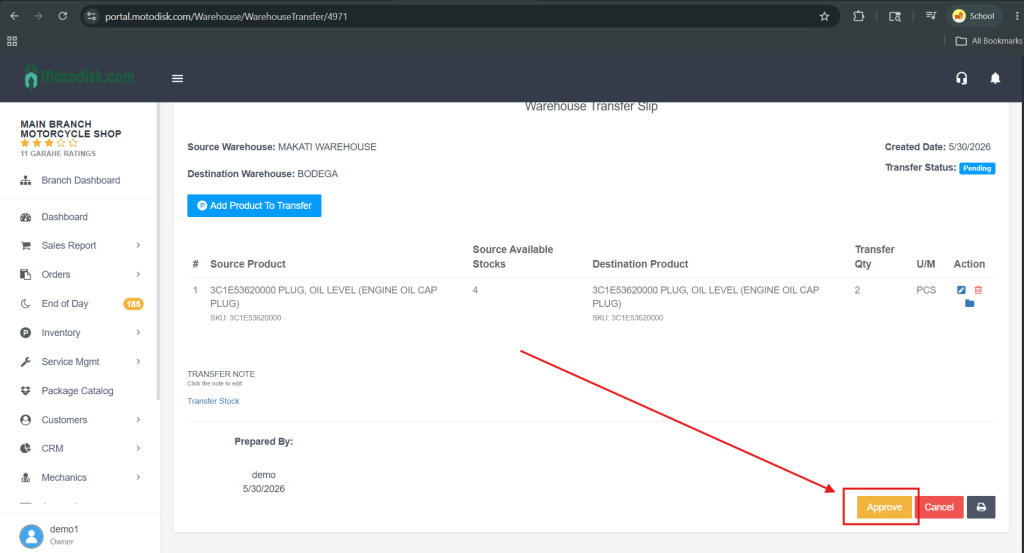
7. Once you have selected all the products and quantities to transfer, click the Approve button to proceed with the stock transfer.
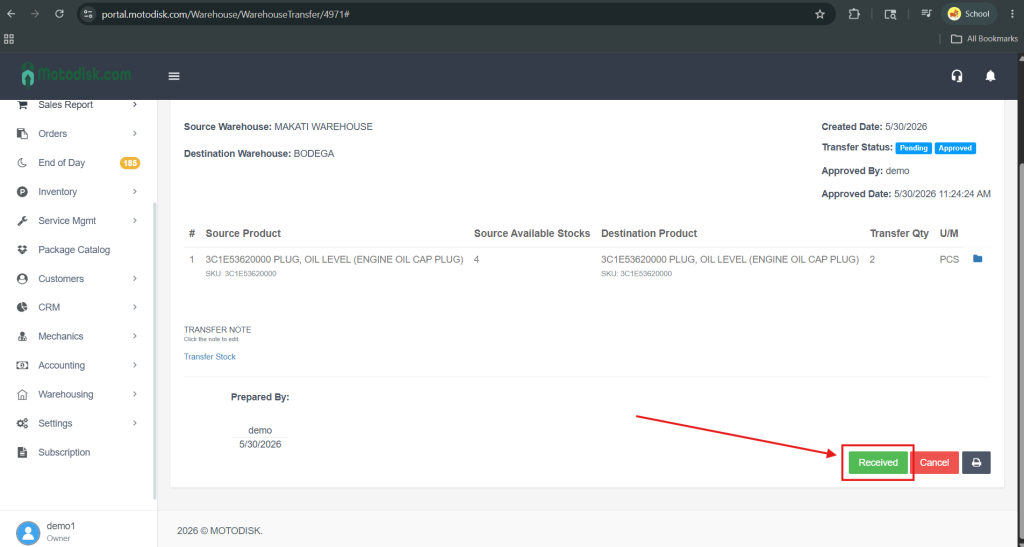
8. Once the transferred products have been received, click the Received button to confirm receipt of the stock.
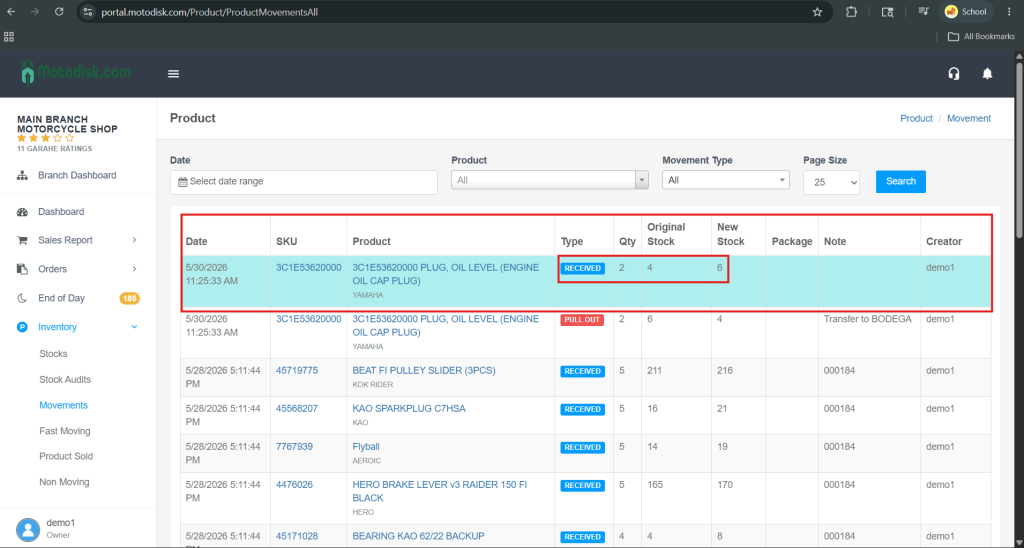
9. After receiving the products, go to Stocks > Movements to view the transfer record. The stock transfer you created will be displayed with a Received status.