- Go to https://portal.motodisk.com and log in.
- In the side bar, select Warehousing > Stack Transfers
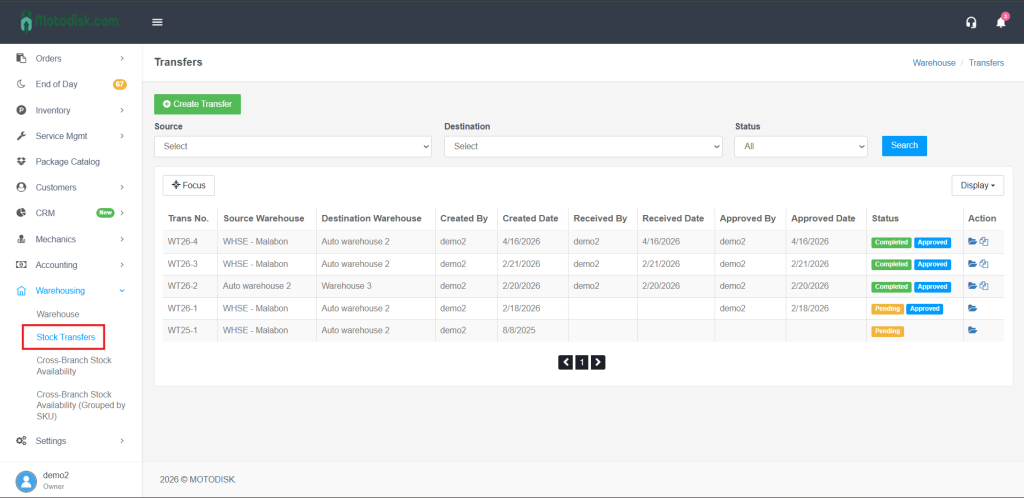
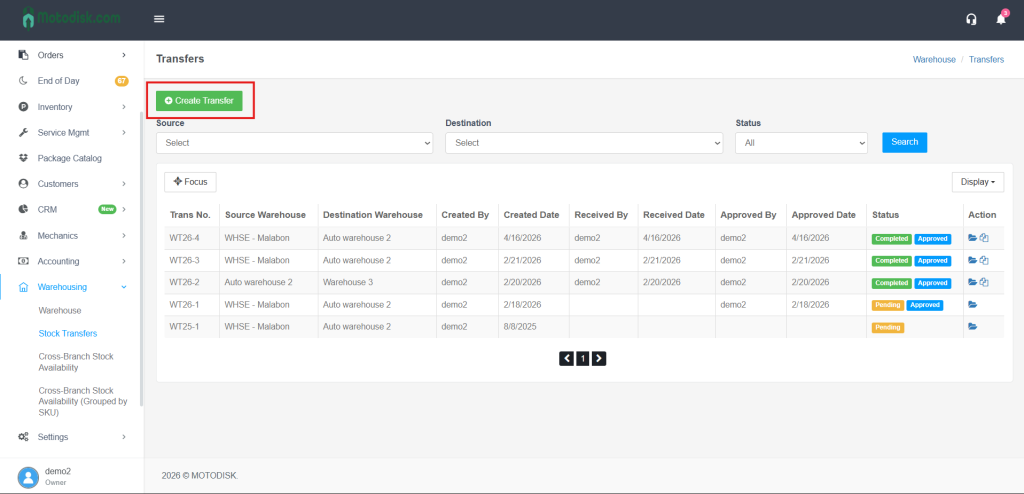
3. After clicking Stock Transfers, click Create Transfer at the top.
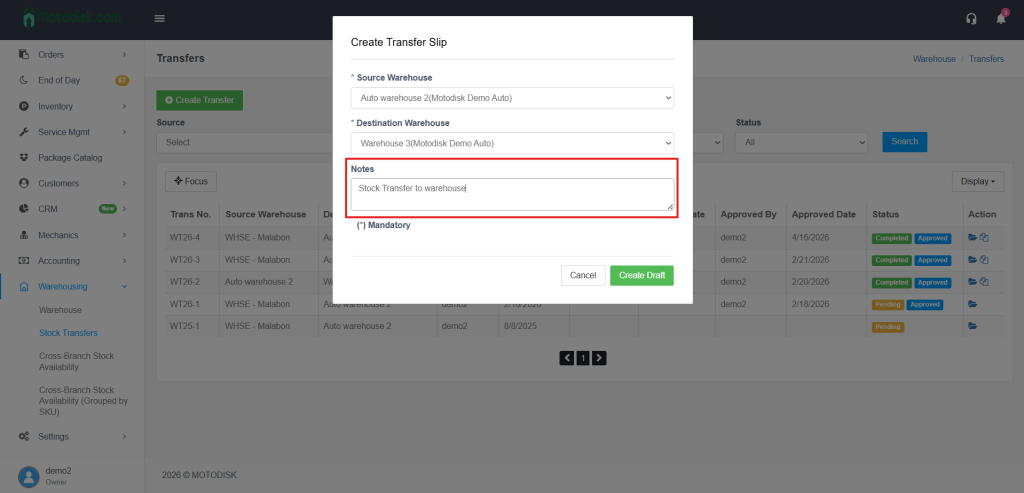
4. After clicking Create Transfer, first select a source warehouse.
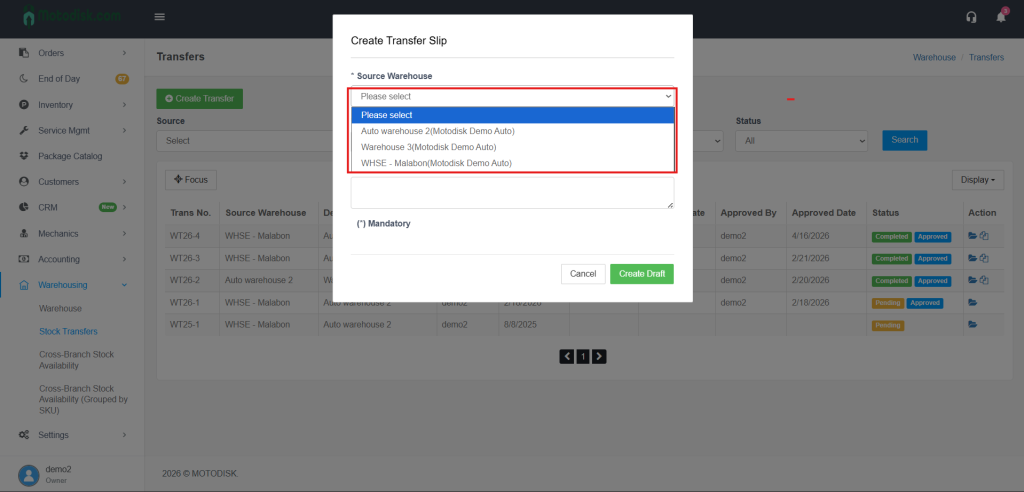
5. After selecting a source warehouse, select the destination warehouse.

6. After selecting the source and destination warehouses, enter the notes/reason for transfer since it is required.
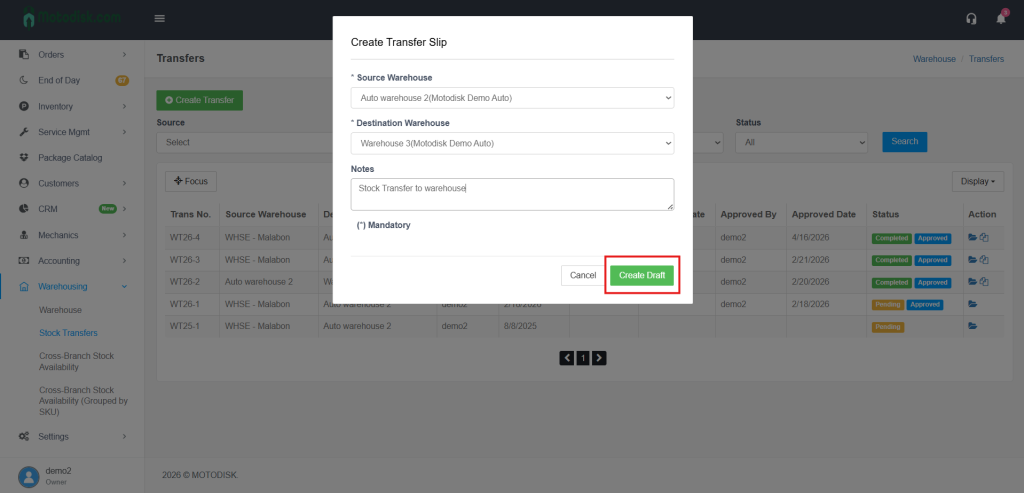
7. Then, click “Create Draft” to create a stock transfer.
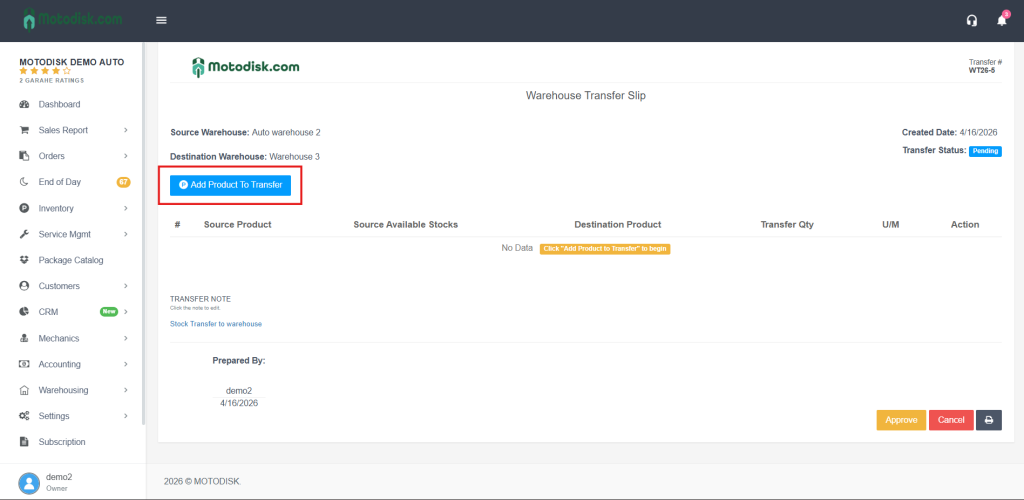
8. Then, click the “Add Product to Transfer” button at the top.
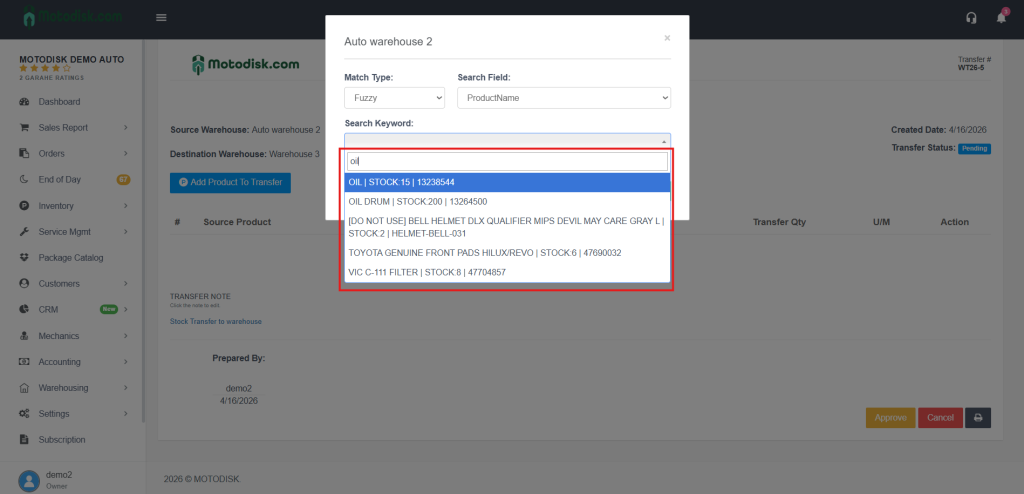
9. Then, search for the specific Product Name you want to transfer. You can also search using the SKU or the product specifications.
Note: You cannot proceed with a stock transfer if the product has 0 available stock.
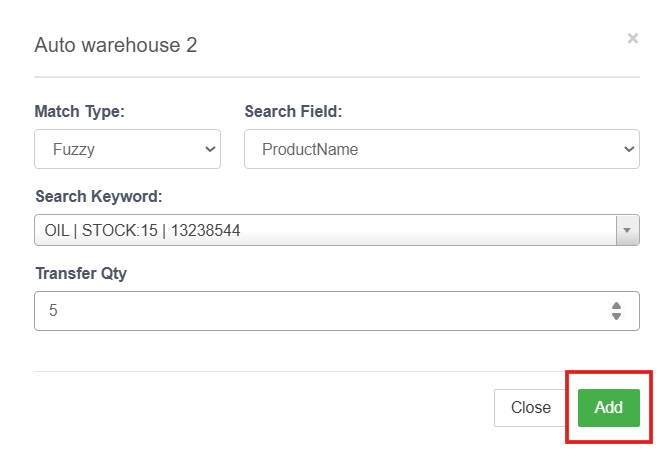
10. Then, enter the quantity you want to transfer.
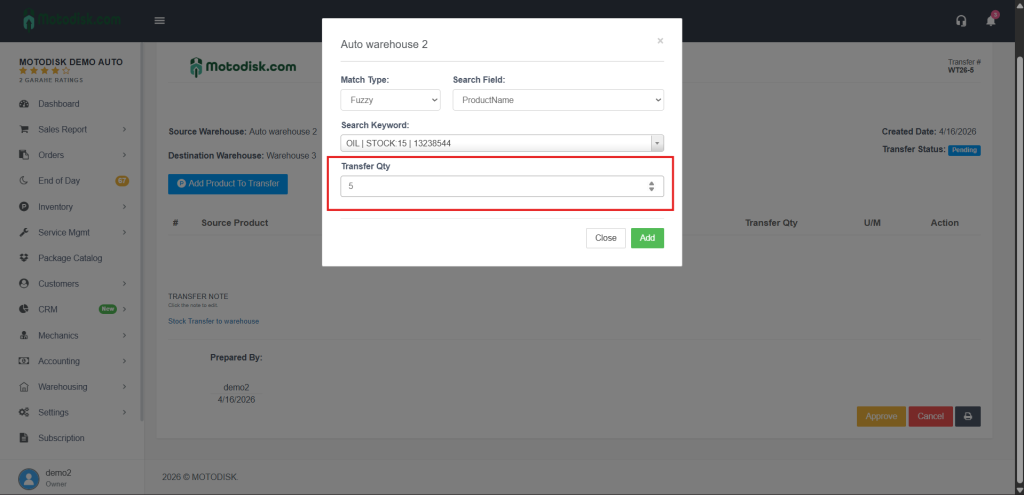
11. Then, click the ‘Add’ button to add the product
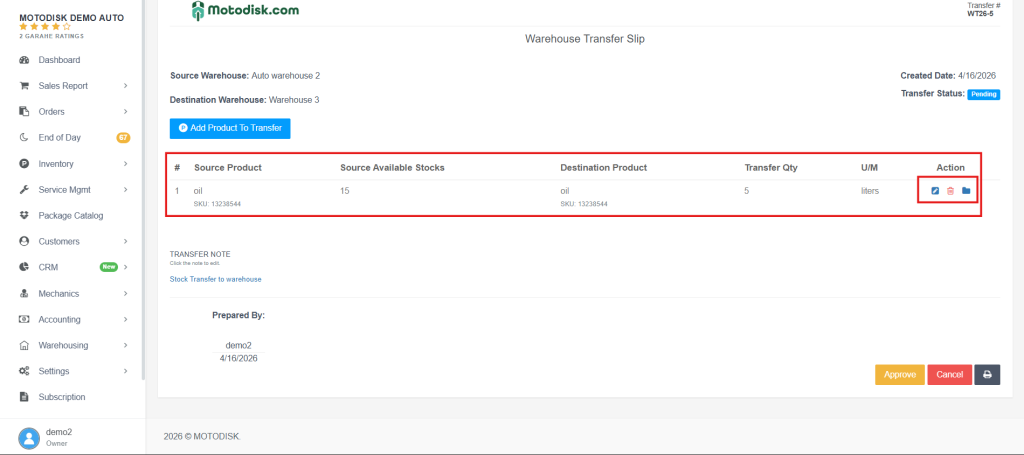
12. After that, the selected products will be displayed in the list for transfer to another warehouse. If you want to add more products, simply click the “Add Product” button again.
Adjust Quantity: To change the product quantity, simply click the pencil icon on the right side.
Delete Product: To remove the product, click the garbage (trash) icon beside the pencil icon.
View Product Details: To view the details of a product, click the folder icon next to the garbage (trash) icon.
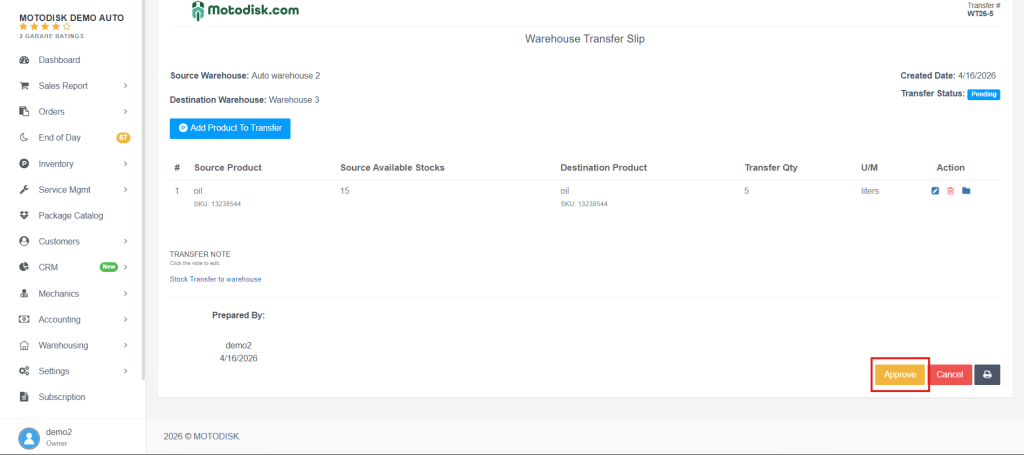
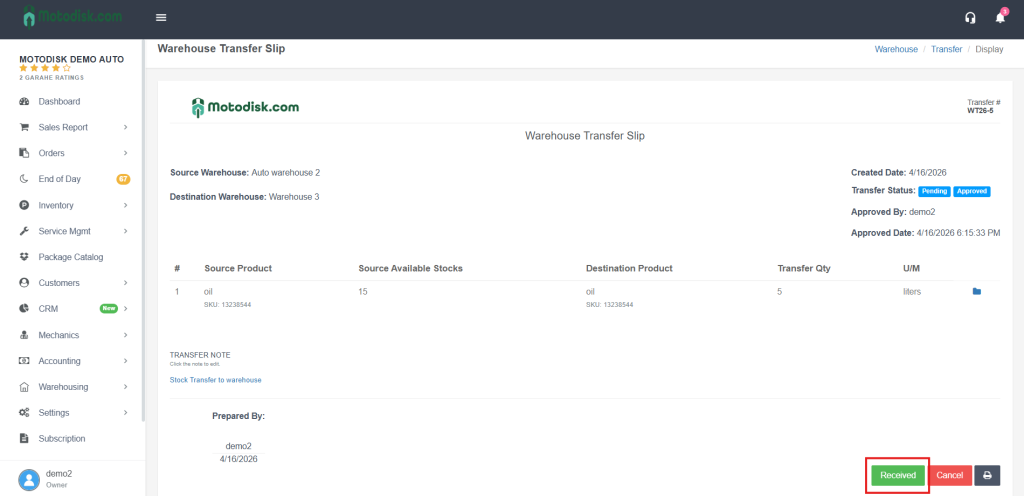
13, Then, click the “Approve” button once everything is finalized.
14. Then, click the “Received” button once you have successfully received the stocks in your warehouse.
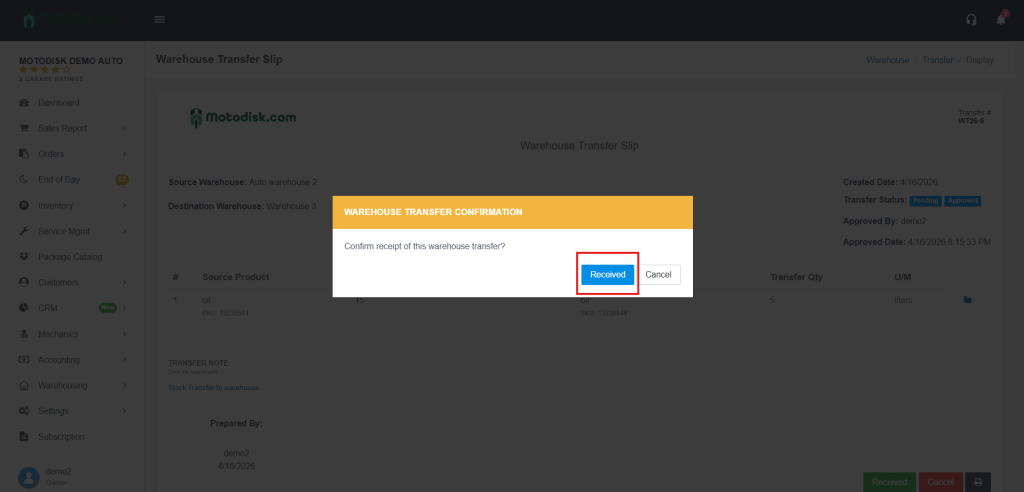
15. Then, click the “Received” button again for final confirmation.
16. Once completed, the status will be updated to “Completed” and “Approved,” and the stocks will be automatically added to your inventory.
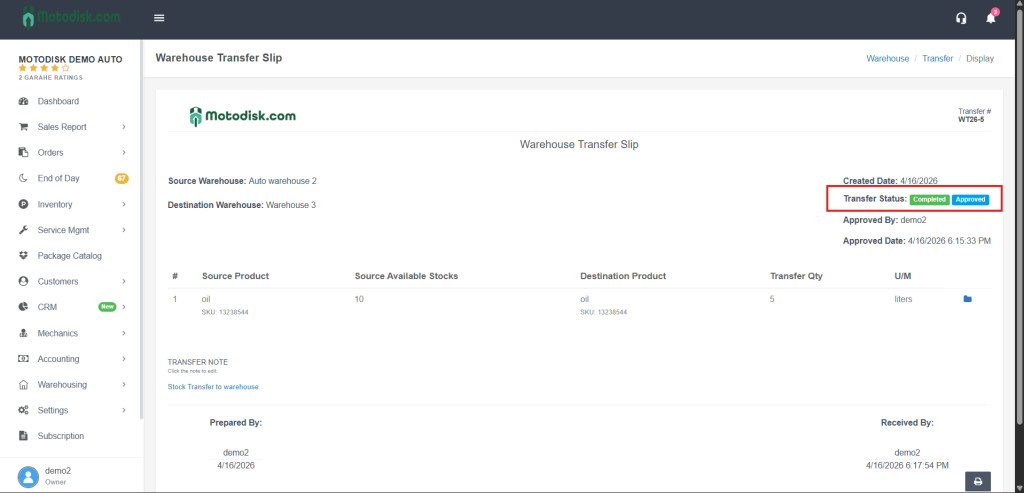
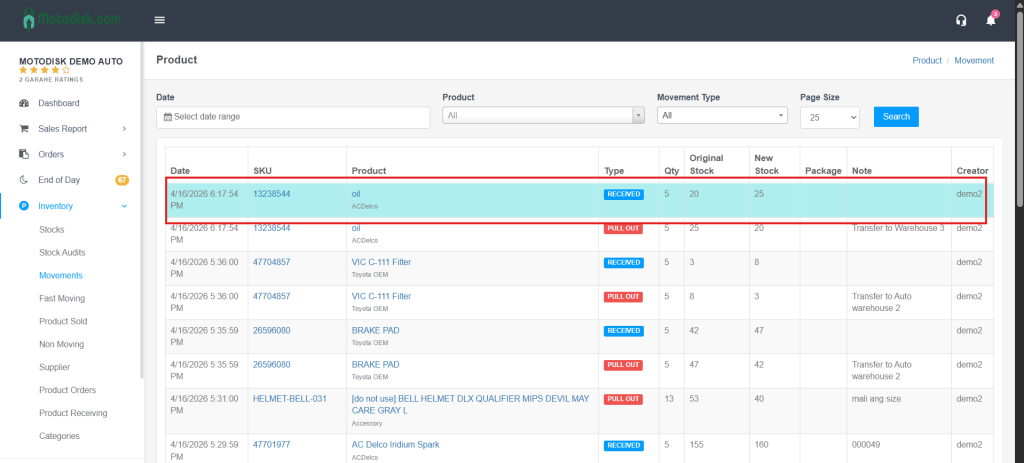
17. It will then be displayed under Stocks > Movements, showing that you received 5 units of that product.