
Guide to managing stock transfers between warehouses.
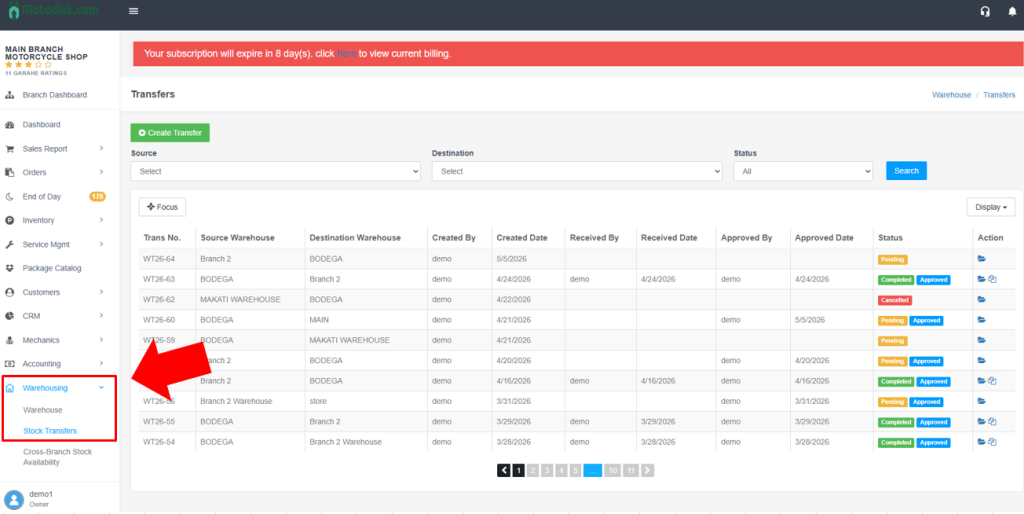
1. Accessing the Stock Transfers Page
- In the left sidebar, find “MOTORSHOP MAIN”.
- Click “Warehousing” (warehouse icon) to expand the menu.
- Click “Stock Transfers” (highlighted in blue when active).
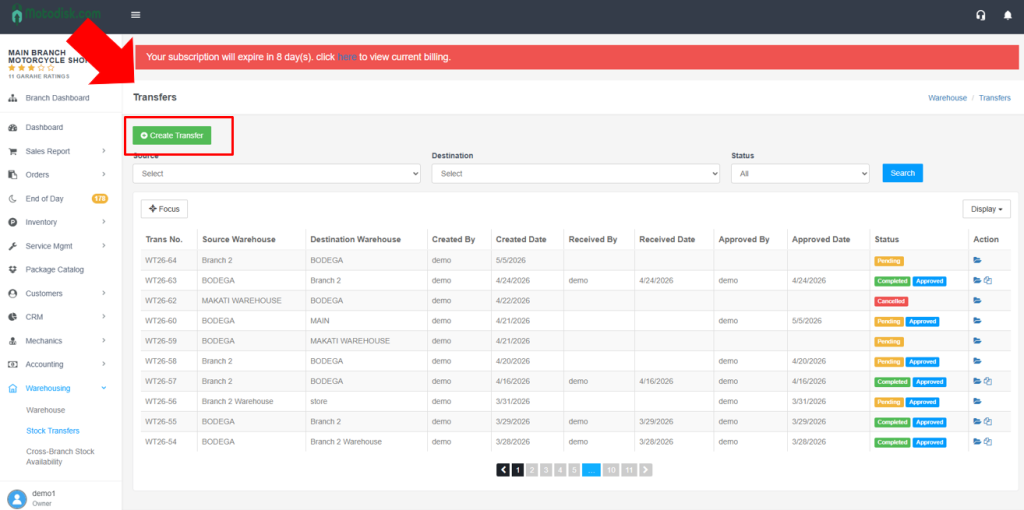
2. Creating a New Stock Transfer
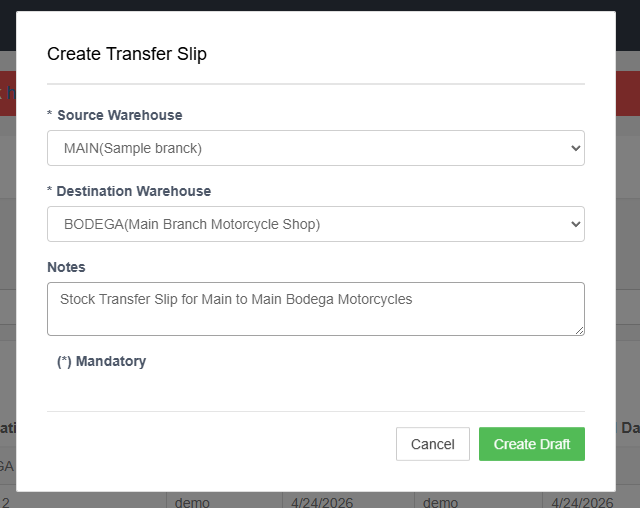
Step 1: Open Create Transfer Modal
- Click the green “+ Create Transfer” button
- The “Create Transfer Slip” modal opens
Step 2: Fill Transfer Information
1. Source Warehouse (required):
- Click the dropdown
- Select the source warehouse (e.g., Amuntay Warehouse)
- Marked with asterisk ()
2. Destination Warehouse (required):
- Click the dropdown
- Select the destination warehouse (e.g., LRG)
- Marked with asterisk ()
- Must be different from Source Warehouse
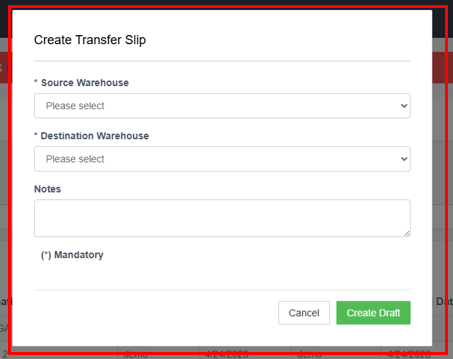
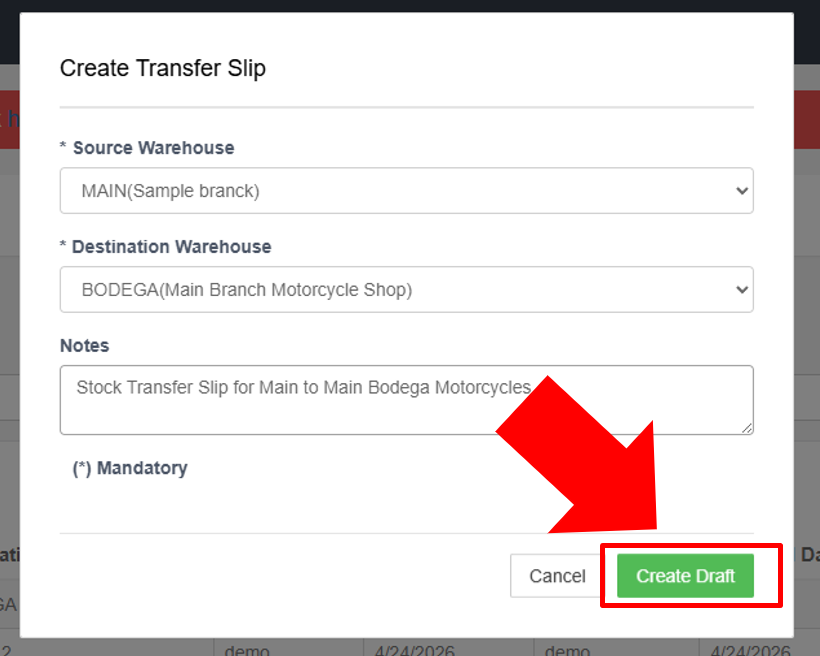
3. Create Draft
Click “Create Draft” (green button)
The transfer slip is created with status “Pending”
You’ll be redirected to the transfer details page
3. Adding Product to a Transfer Slip
Step 1: Open Create Transfer Modal
- Click the green “+ Create Transfer” button
- The “Create Transfer Slip” modal opens
A modal opens showing the source warehouse name (e.g., “Main Warehouse”)
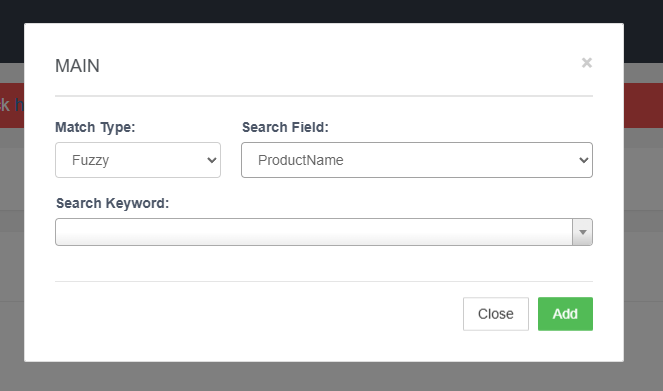
Step 2: Search for Products
1. Match Type
- Fuzzy – Finds similar or related products
- Match – Finds only exact product matches
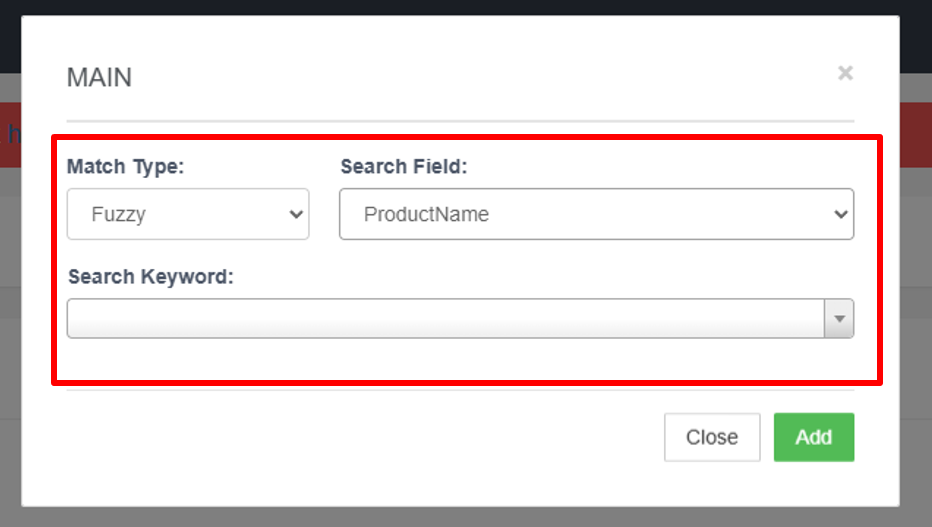
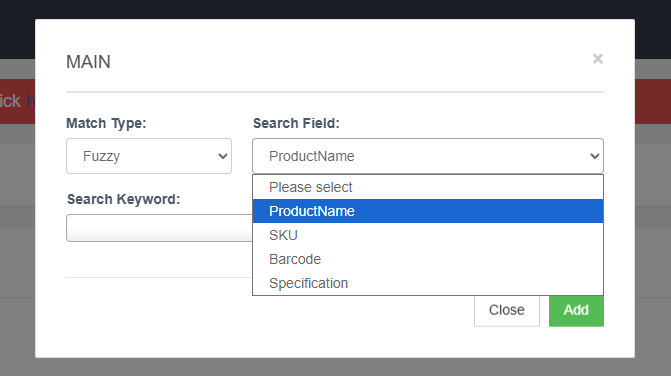
2. Search Field: Select what to search
- ProductName: Search by product name (default)
- SKU: Search by SKU
- Barcode: Search by barcode
- Specification: Search in product specifications
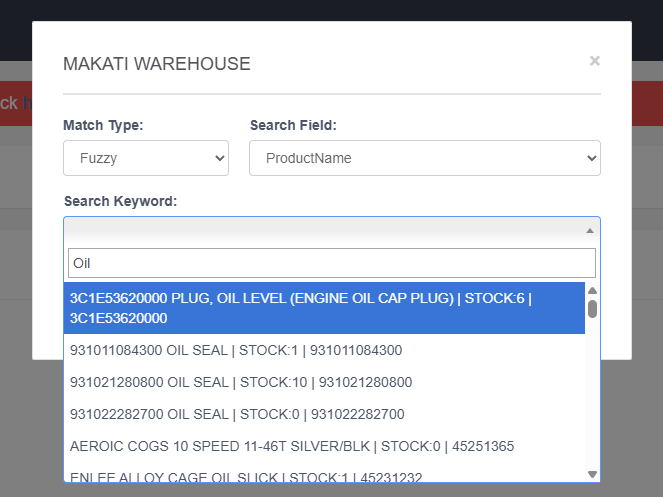
3. Search Keyword: Type at least 1 character related to the Search Field
- ProductName: Search by product name (default)
- SKU: Search by SKU
- Barcode: Search by barcode
- Specification: Search in product specifications
Step 3: Select Product and Quantity
- Click a product from the filtered list
- Enter Transfer Qty (quantity to transfer)
- Use up/down arrows or type directly
- Cannot exceed Source Stocks
Click Add to Successfully add Stocks to the Transfer Slip
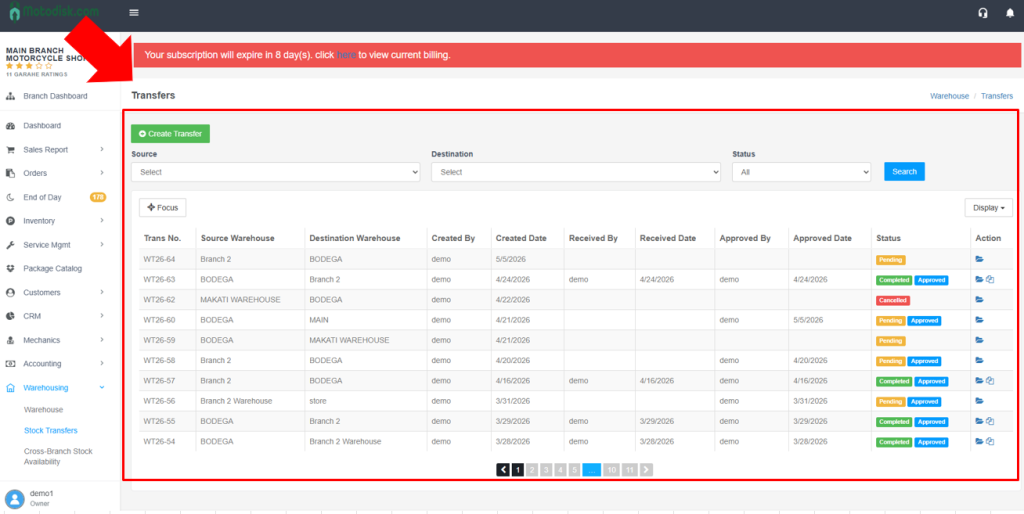
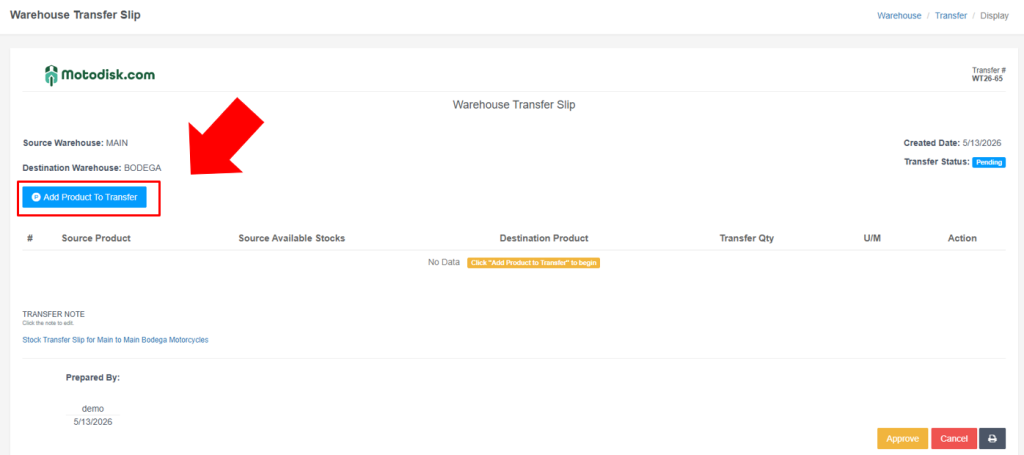
4. Understanding the Transfer Slip (Details Page)
Warehouse Information:
- From Warehouse: Source warehouse name
- To Warehouse: Destination warehouse name
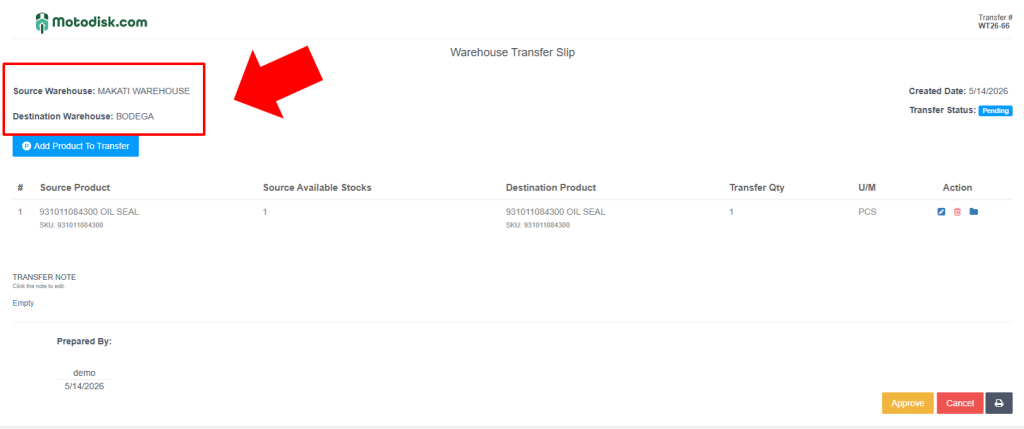
Product Transfer Table:
Columns:
- #: Item number
- Source Product: Product name and SKU from source warehouse
- Source Stocks: Available quantity in source warehouse
- Destination Product: Product name and SKU (usually same as source)
- Transfer Qty: Quantity being transferred (editable)
- U/M: Unit of Measure (e.g., PCS)
- Action: Icons for edit, delete, view

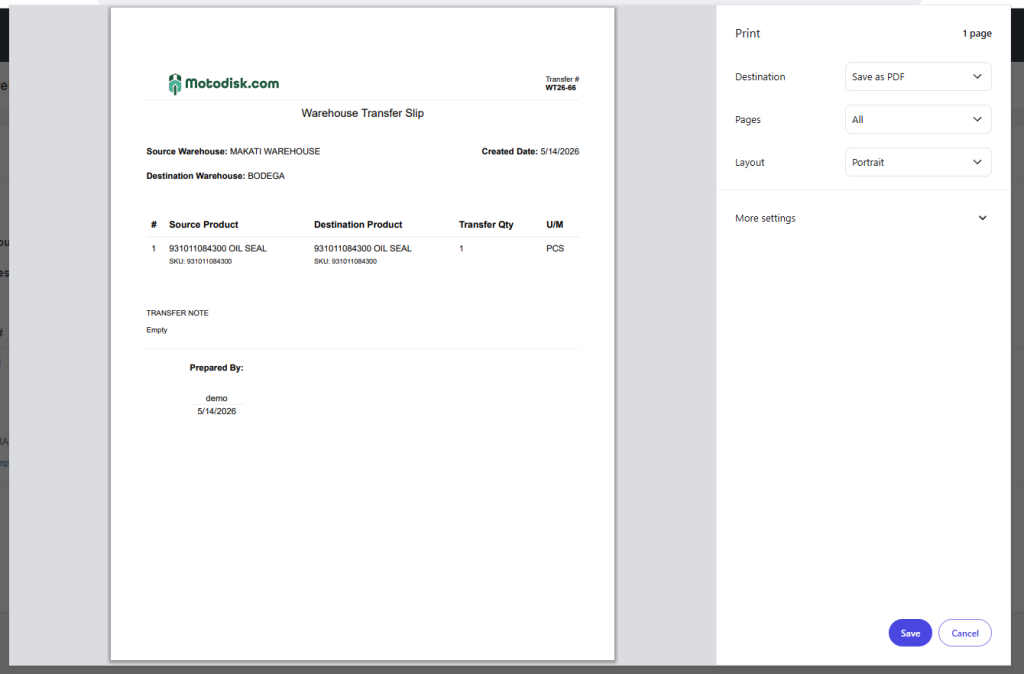
Print the Transfer Slip
Click the Print button to print the Transfer Slip

Use the printed transfer slip to audit stock transfers that have been transferred to the warehouse.
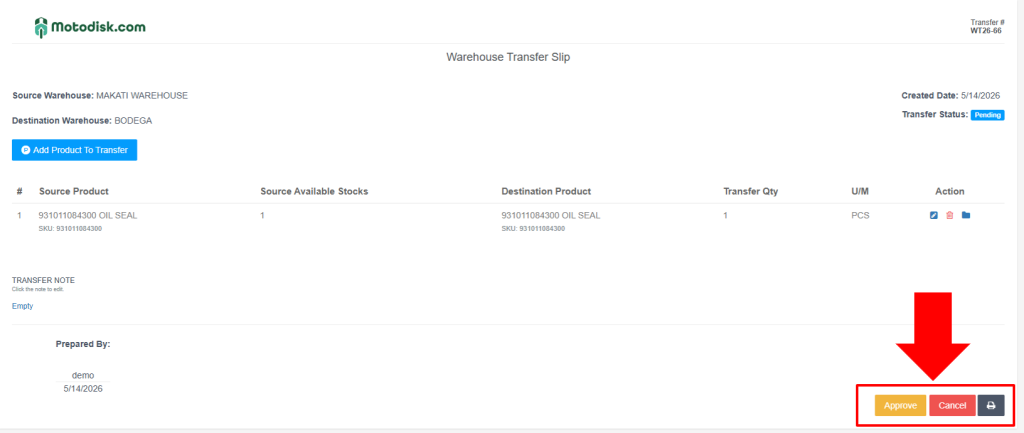
Click Approve button Stock Transfer once Stock Transfer Slip is printed and to be given by the staff management
5. Completing a Stock Transfer
if the stock transfer has been audited
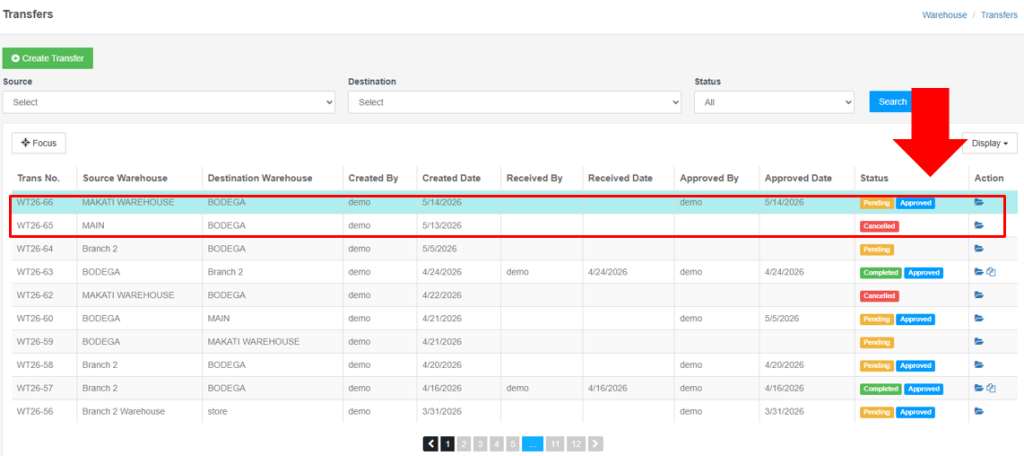
In the Action column, click the folder icon for items with a Pending status.
Note: Cancelled means the stock transfer was stopped/discontinued and Completed means the stock transfer has already been completed.
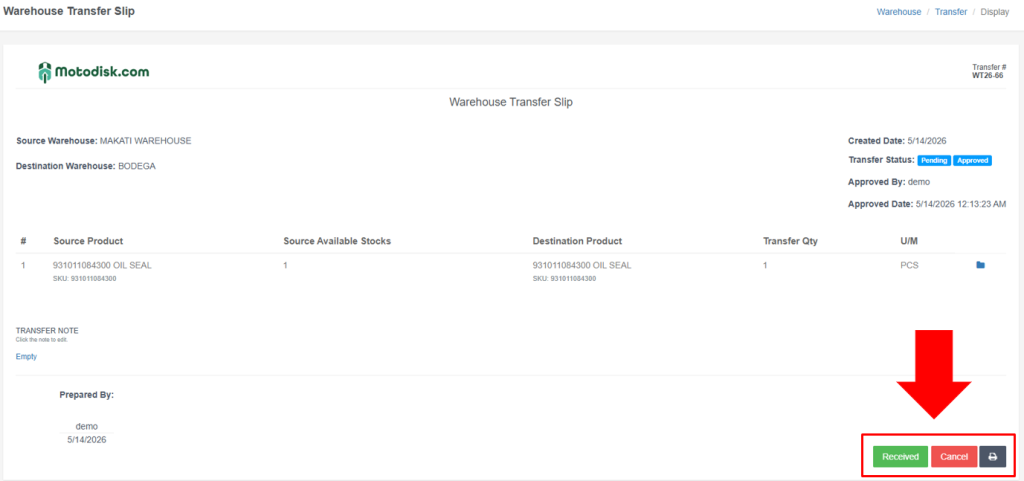
Mark Transfer as Received
- On the transfer details page, click the green “Received” button if stocks has been successfully transferred by staff management.
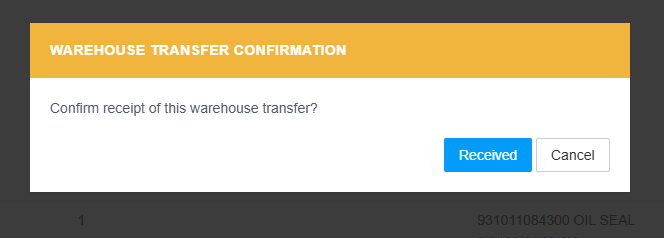
System processes the transfer:
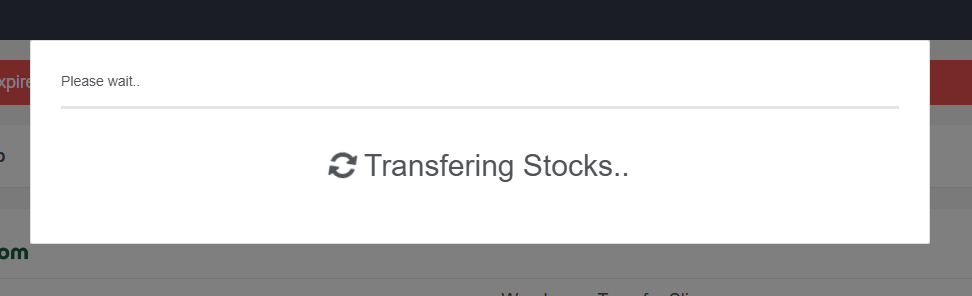
- Shows “Transferring Stocks..” message
- Updates stock levels in both warehouses
- Changes status to “Completed”
- Records “Received By” and “Received Date”
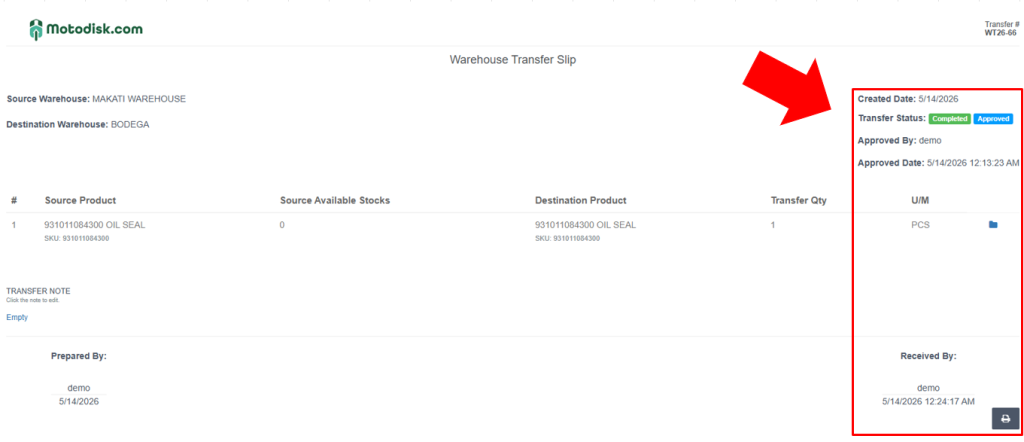
The stock transfer has been completed, the status will change to “Completed,” and the stocks have been added to the warehouse.
Video Tutorial
Tips for Effective Transfer Management
- Verify Stock Availability: Check Source Stocks before adding products
- Use Notes: Add notes for context (e.g., “Restocking”)
- Review Before Receiving: Verify all products and quantities before marking as received
- Print for Records: Print completed transfers for physical documentation
- Filter Regularly: Use filters to find specific transfers quickly
- Monitor Pending: Regularly check pending transfers to ensure timely completion
- Check Dates: Review Created Date and Received Date to track transfer timelines