
How to Record Sales with Job Order
Step 1: Login to Motodisk Application
Step 2: Enter your credentials to login
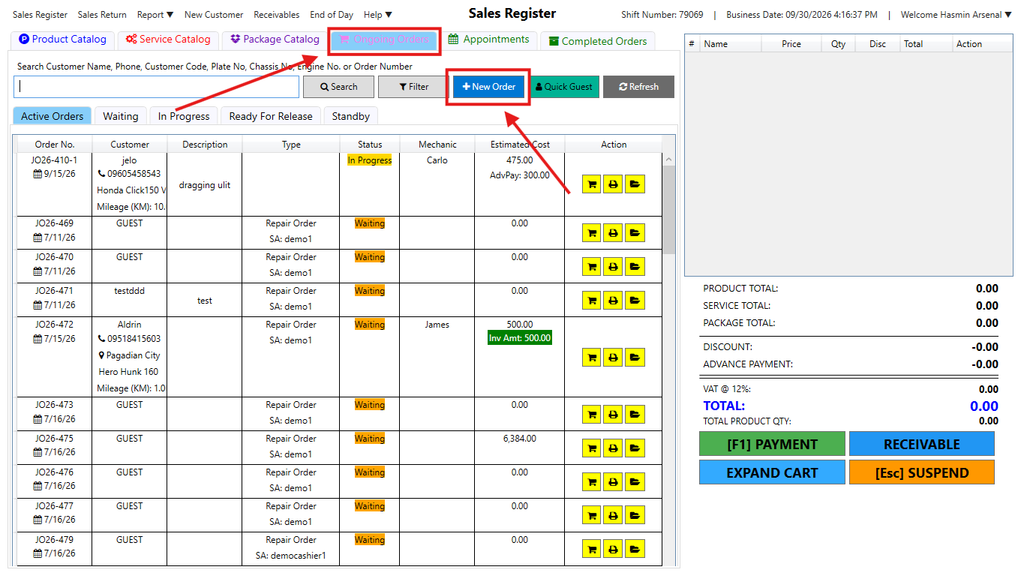
Step 3: Click Ongoing Orders then, New Order
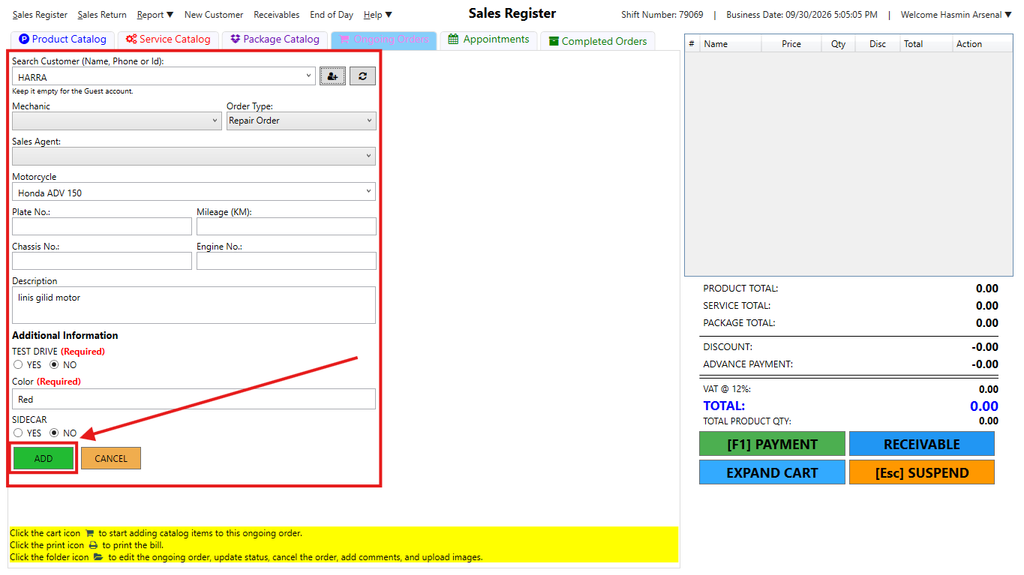
Step 2: Fill in the fields
- Customer name is optional, you can leave it blank
- Mechanic/Agent is required if there is a Service
- Motorcycle, Plate No., Odometer and Description is also optional
- Additional Information that has required label is necessary to fill in
- Click Add
It’s a good idea to add a unique name or label to each Job Order so you can easily tell which one belongs to which customer. This helps avoid confusion when adding more products or services later, especially if you have multiple orders showing on the screen.
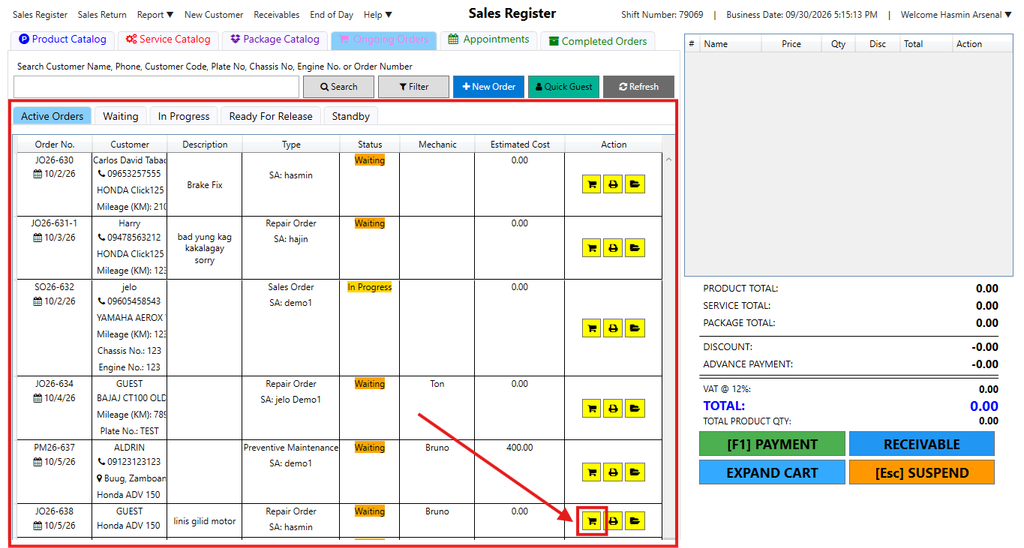
Step 3: Add Product / Service
- Hover to Ongoing Orders (Active Orders), since its FIFO (First In, First Out), scroll down to the bottom to see your new added Job Order then click the cart icon to add products or services
- Go to Product Catalog to add items
- Go to Service Catalog to add Services
- Go to Package Catalog to add a Package
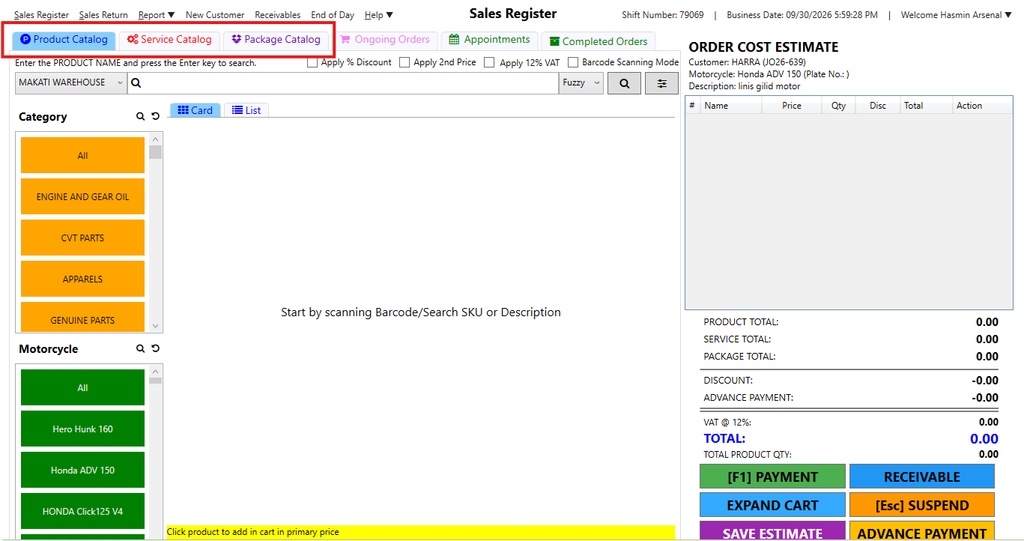
- Selected products and services is shown in the quotation on the right side
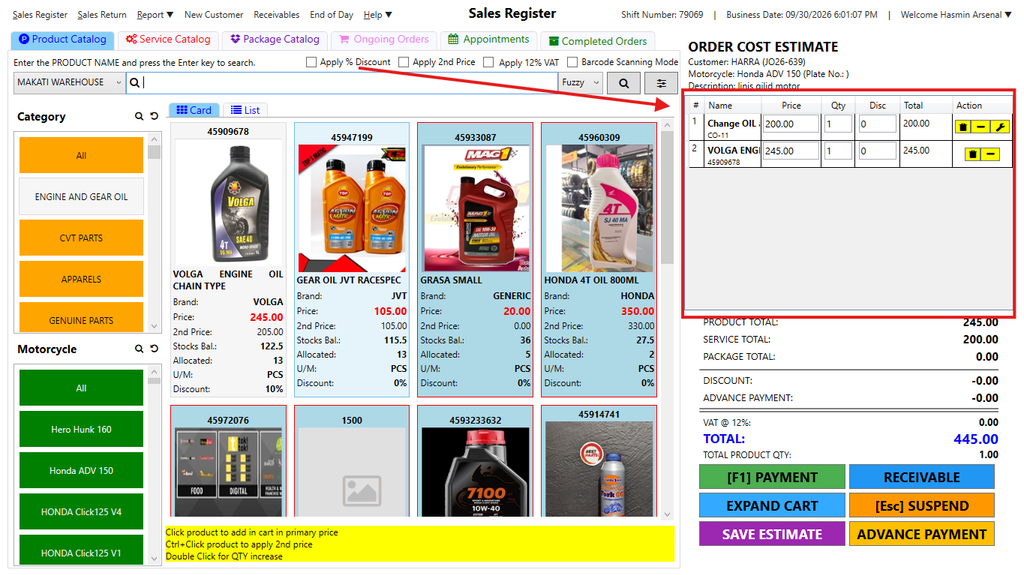
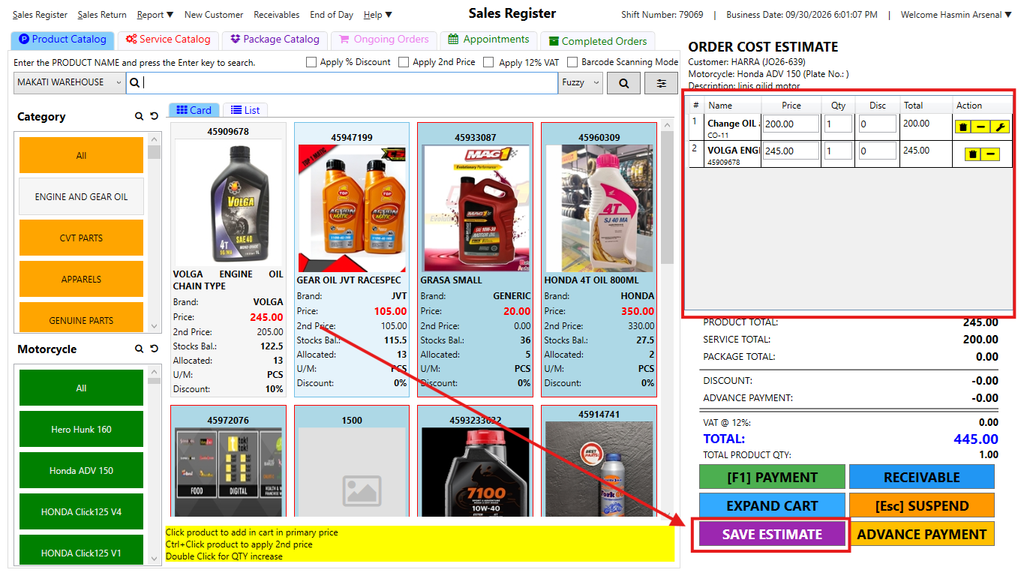
Then click Save Estimate, if Customer is not yet paying
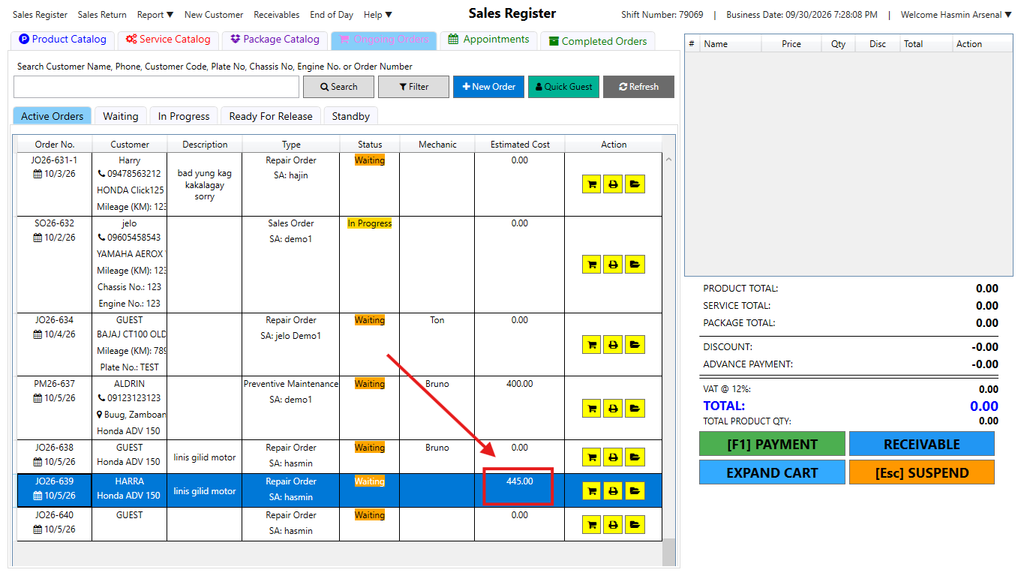
Step 4: Your ongoing job order will now display in the list of orders. If you want to see it, click Ongoing Orders, you should see it at the bottom of the list. Notice that it has already captured the added product and/or services.
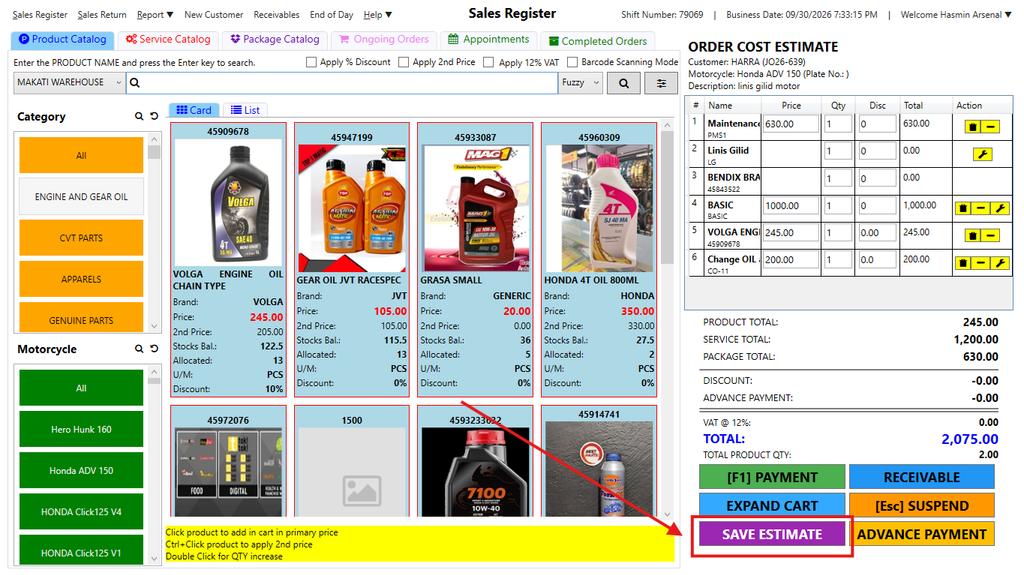
Step 5: If you want to add more products/services, click again the cart icon. Then select from Product Catalog, Service Catalog or Package catalog the products/services you want to add. Then click Save Estimate.
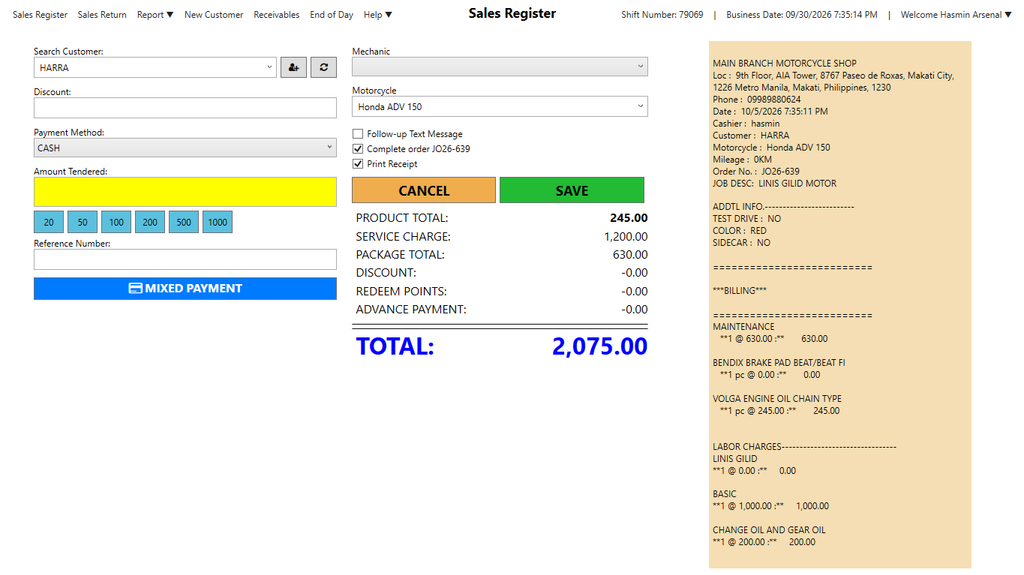
Step 6: Click Payment if customer is paying and click Receivable if it will be paid at a later date.
- Enter the mode of payment and amount received
- Click Save
Here’s your video guide – how to create a Job Order: